


Environments
At GrapheneDB all databases are deployed into Environments. Environments are regional, which means that they are locked to one AWS region. Environments provide a way to group databases and configure the same Network Access rules (IP Whitelist and VPC peering), as well as configure access to a group of members of the Organization.
You can manage Member access to Databases deployed into Environments by choosing the Environment type.
⚠️ Important:
- Please make sure you configure Network rules after creating the Environment.
- Region and Address Range cannot be changed after creation. Please make sure to choose them carefully.
Environments types
Environment types are a way to categorize the different categories of environments you have, eg. staging, production, etc. You can choose the Environment Type by assigning a color to it, and you can provide access to that specific Environment to Operators of your Organization.
Environments will be displayed to all Operators with access to the specific type. Meaning that the Operators will be able to have access to the Deployments, Network Access and Settings for the specific Environment Type (color).
AWS region
We support most AWS regions. If you don’t find the AWS region in the list, it might be new and we’re probably working on adding it.
Feel free to open a Support Case to ask about the progress on it.
| Region name | Region code |
|---|---|
| EU (Frankfurt) | eu-central-1 |
| EU (Ireland) | eu-west-1 |
| EU (Stockholm) | eu-north-1 |
| EU (Paris) | eu-west-3 |
| EU (Milan) | eu-south-1 |
| EU (London) | eu-west-2 |
| Asia Pacific (Tokyo) | ap-northeast-1 |
| Asia Pacific (Seoul) | ap-northeast-2 |
| Asia Pacific (Sydney) | ap-southeast-2 |
| Asia Pacific (Hong Kong) | ap-east-1 |
| Asia Pacific (Singapore) | ap-southeast-1 |
| Asia Pacific (Mumbai) | ap-south-1 |
| US East (Northern Virginia) | us-east-1 |
| US East (Ohio) | us-east-2 |
| US West (N. California) | us-west-1 |
| US West (Oregon) | us-west-2 |
| Canada (Central) | ca-central-1 |
| South America (Sao Paulo) | sa-east-1 |
| Africa (Cape Town) | af-south-1 |
| Middle East (Bahrain) | me-south-1 |
| Middle East (UAE) Region | me-central-1 |
IP Address Range
Below you’ll find important information to help you choose the appropriate IP address range.
If you’re not sure about this setting, you can leave it at the default value.
The allowed range for CIDRs currently is:
- 172.x.y.0, 16 ≤ x ≤ 31, 0 ≤ y ≤ 255
We currently allow a specific range of CIDRs, which are represented as 172.x.y.0. In this range, the value of x can range from 16 to 31, and the value of y can range from 0 to 255. This description covers all the available CIDRs that are permitted within our system.
The CIDR must not overlap with reserved CIDRs - not allowed ranges.
Currently these are:
- 172.28.0.0/16
Bad options are:
- 172.16.0.0/16 - heavily used
- 172.17.0.0/16 - Docker’s default
Host identifier:
- Host identifier bits must be 0.
When we talk about the number of bits for the host identifier, we’re essentially referring to the part of an IP address that distinguishes one device from another on the same network. This number is calculated by subtracting the subnet mask (usually represented as /xy) from 32. For example, if the subnet mask is /24, it means that 32 - 24 = 8 bits are available for the host identifier.
Now, in the context of subnet definition, host identifier bits are the least significant bits in the 32 bit integer represented by the bytes in the CIDR block. These host identifier bits must all be set to zero (0) within the subnet. This ensures that devices within the same subnet can communicate effectively and are recognized as part of the same network.
The subnet mask:
- Must be between 16 and 25.
The subnet mask is a critical part of defining a network’s structure. Subnet mask determines how many network addresses are available in a CIDR block. The number of addresses is 2 ^ (32 - <subnet_mask>).
In our system, it must fall within the range of 16 to 25. This range ensures that networks can be appropriately configured and managed within our platform while maintaining compatibility with various network setups and requirements.
Creating an Environment
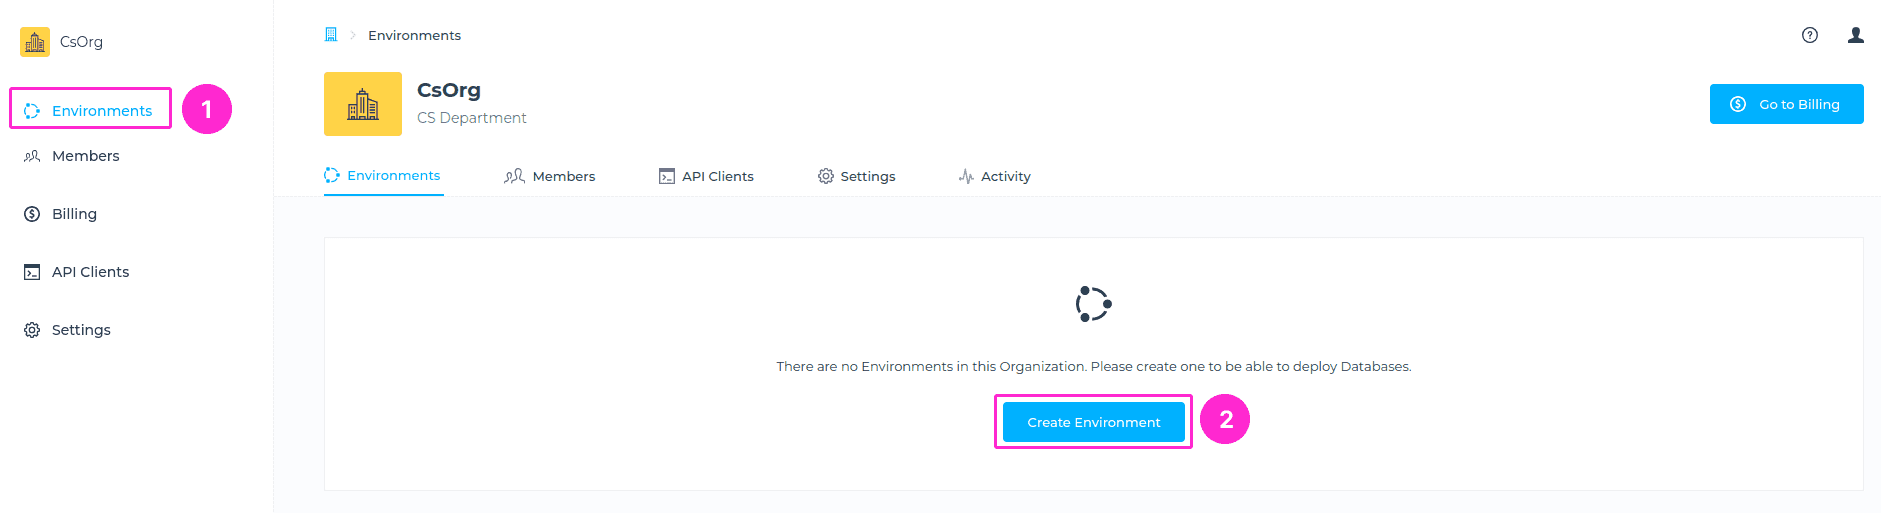
Environments can be created within an Organization. Select the Organization from the drop-down menu in which you want to create a new Environment, go to Environments and click on the Create Environment button.
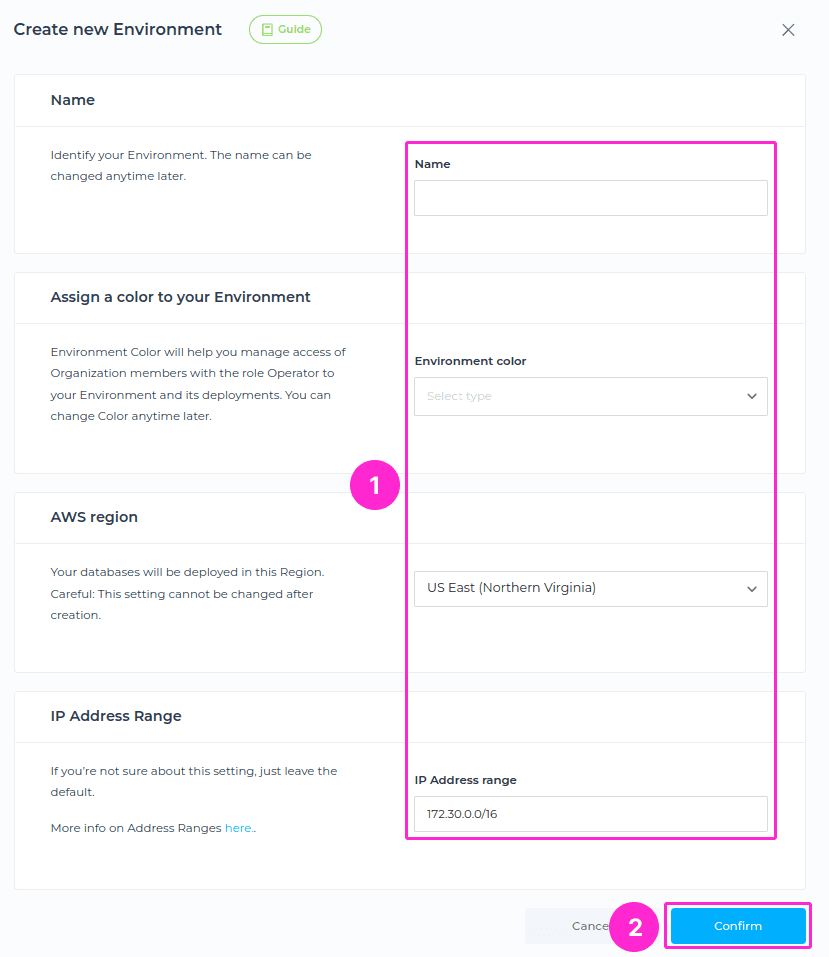
You’ll be prompted to the next section where you will need to enter the Environment name, Type, Region, and IP address range. Once you set all the required fields, please click on Confirm button.
ℹ️ Info
When naming the Environment these conditions must be met:
- At least two characters long.
- At most thirty characters long.
- Can only contain alphabetical characters, numbers, underscore or dashes.
Managing an Environment
In your Environment, you can create your databases, set up Network Access rules, manage the Settings of the Environment and have a detailed view of Environment Activity.
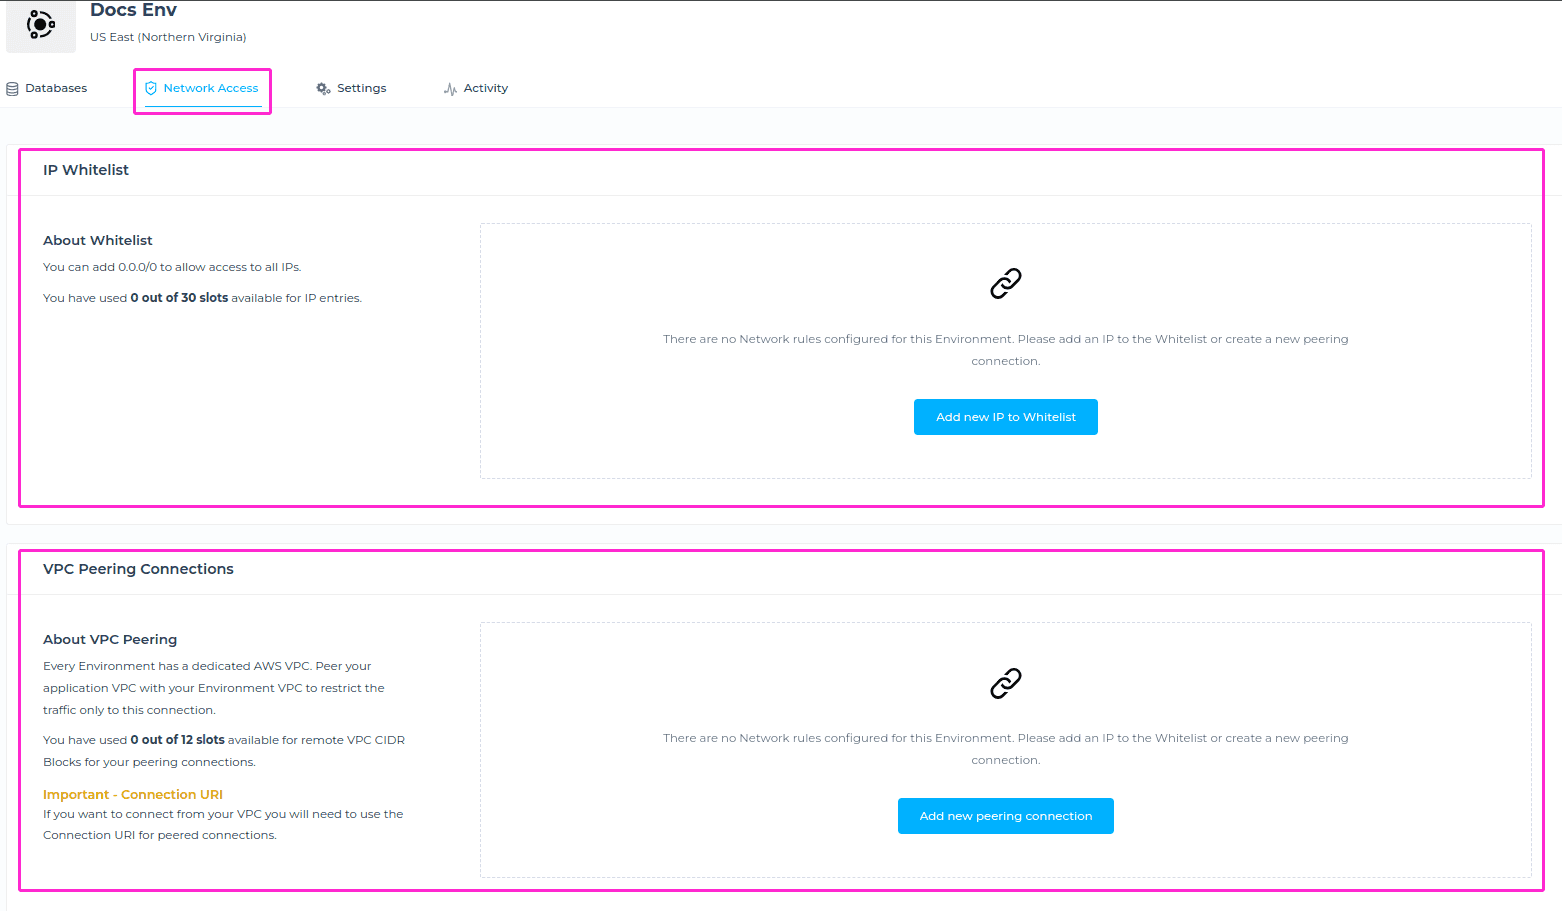
Network Access
In the Network Access section you can configure the VPC peering and IP Whitelist for your deployments within respective Environment. Navigate to the Organization your Environment is placed within, and choose the desired Environment from the list of created Environments. Then, click on Network Access tab and configure the IP Whitelist and/or VPC peering.
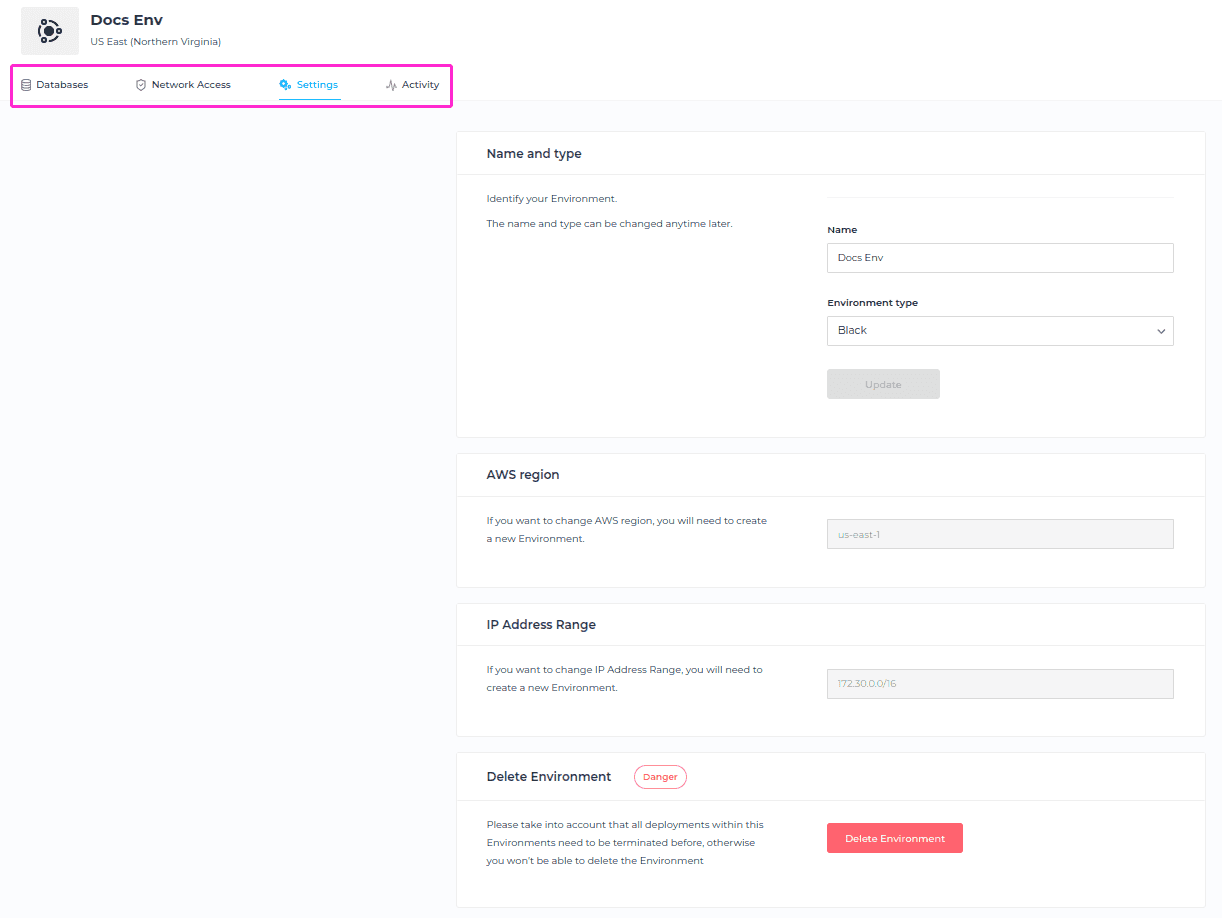
Environment Settings
In the Environment Settings section, you can change the name of the Environment, and change the Environment Type. Please note that AWS region and IP address range cannot be changed.
You can also delete the Environment by clicking on the Delete Environment button. Please take into account that all deployments within the Environments need to be terminated, otherwise you won’t be able to delete the Environment.
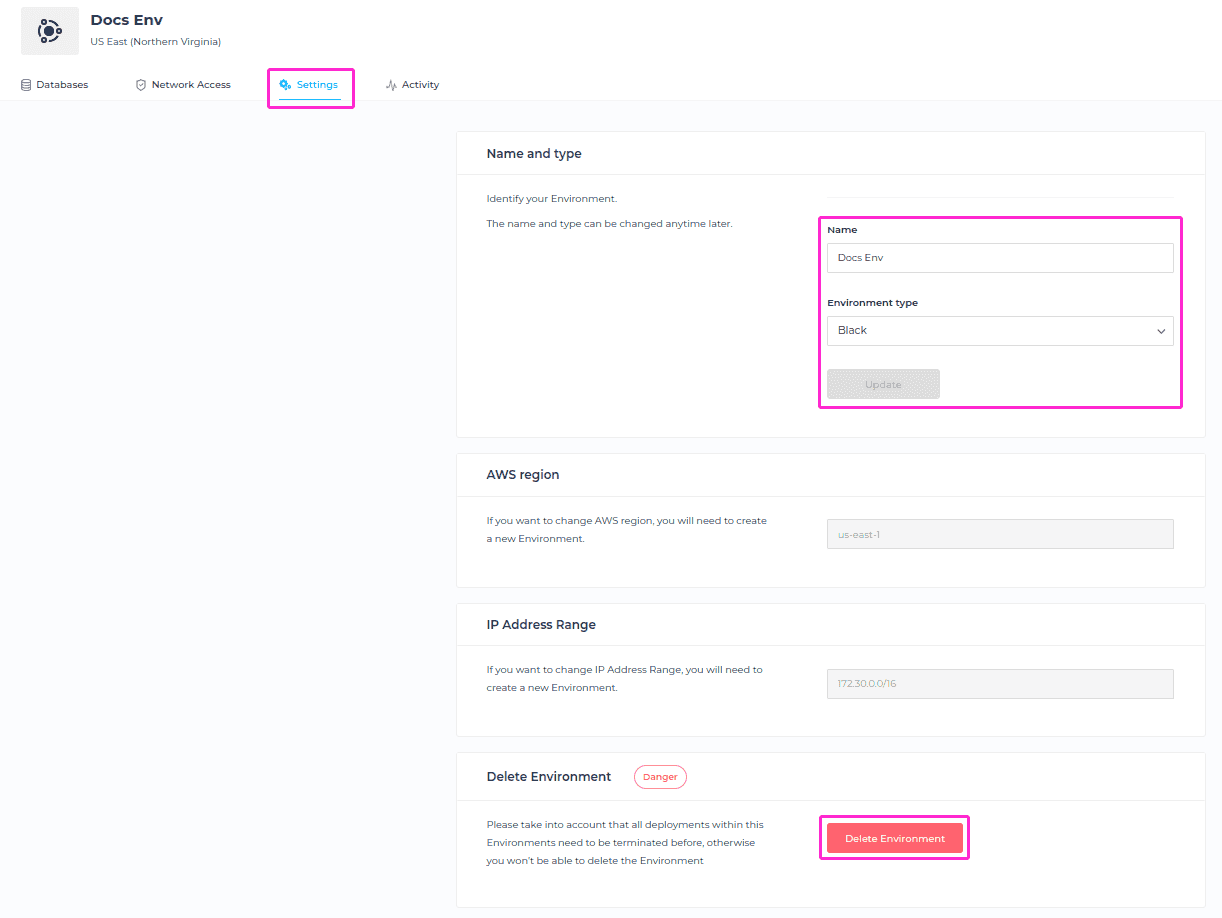
If you select the delete button, a modal window will appear as a confirmation that you’re about to delete the selected Environment. You will need to enter the name of your Environment to be able to delete it.
Deleting an Environment
⚠️ Important
All deployments inside the Environment must be deleted before the Environment can be deleted. Only the Owner and Admin can delete the Environment.
To delete an Environment, after ensuring that all deployments are deleted, please navigate to the Environments tab of your Organization, where you’ll be able to see a list of your Environments (unless there’s only one). Next, click on the trashcan icon on the right-hand side next to the Environment you want to delete.
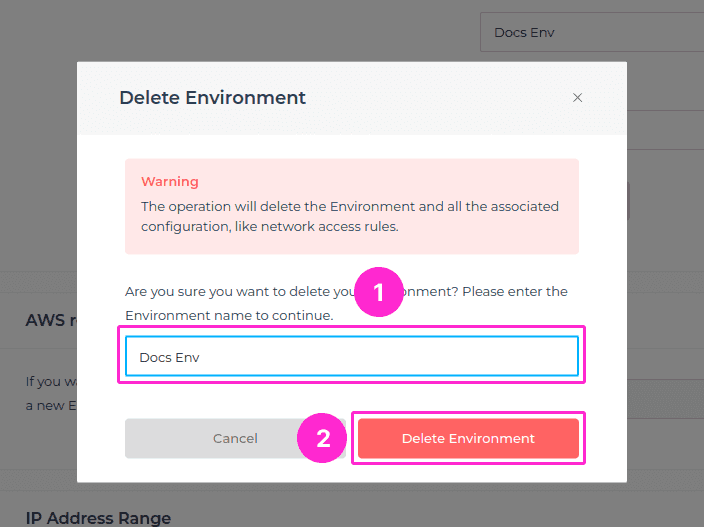
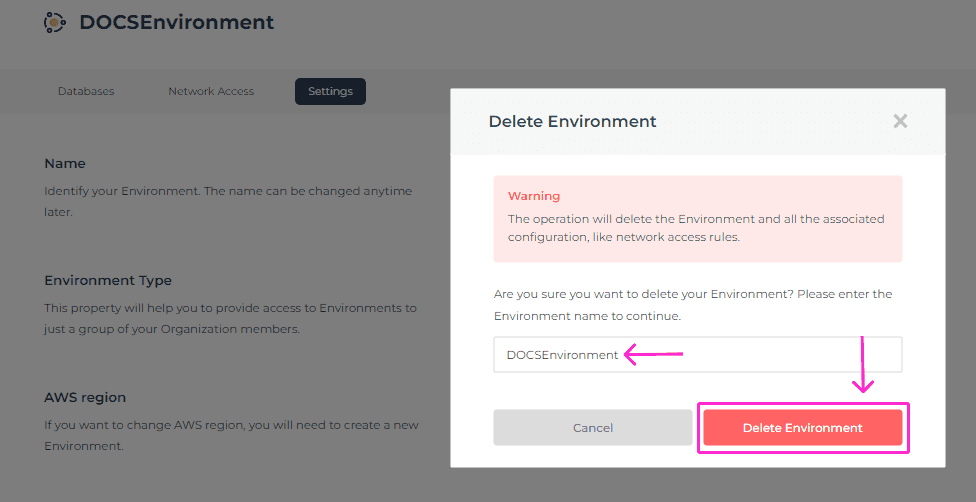
A modal window will appear as a confirmation that you’re about to delete the selected Environment. You will need to enter the name of your Environment to be able to delete it. Click on the Delete Environment button.
⚠️ Important
The operation will delete the Environment and all the associated configuration, like network access rules.
Environment Activity
In this section, you’ll be able to see the last activities of your Environment. Navigate to the Environment view > Activity (as shown in the screenshot below). You can check the activity for all users or only a specific user, as well as sort it by Category for more specific visibility of activities.
ℹ️ Info
Activities are going to be marked for expiration after 1 month.
