


Overview
This guide will walk you through the process of loading an exported database file from GrapheneDB into your local Neo4j instance. GrapheneDB provides an efficient way to manage your Neo4j databases, and exporting your data ensures you can restore or analyze it locally when needed. We’ll show two examples below, one being local Community Neo4j database which is the recommended way, other being local database in Neo4j Desktop which is not the recommended way, since the Neo4j Desktop creates the Enterprise database. Using the Enterprise edition can be a bit problematic if you’re aiming to stick with the free Community edition. Even with a personal Developer License for local use, you might run into some problems trying to move your graph back to Community later.
Export the database from GrapheneDB
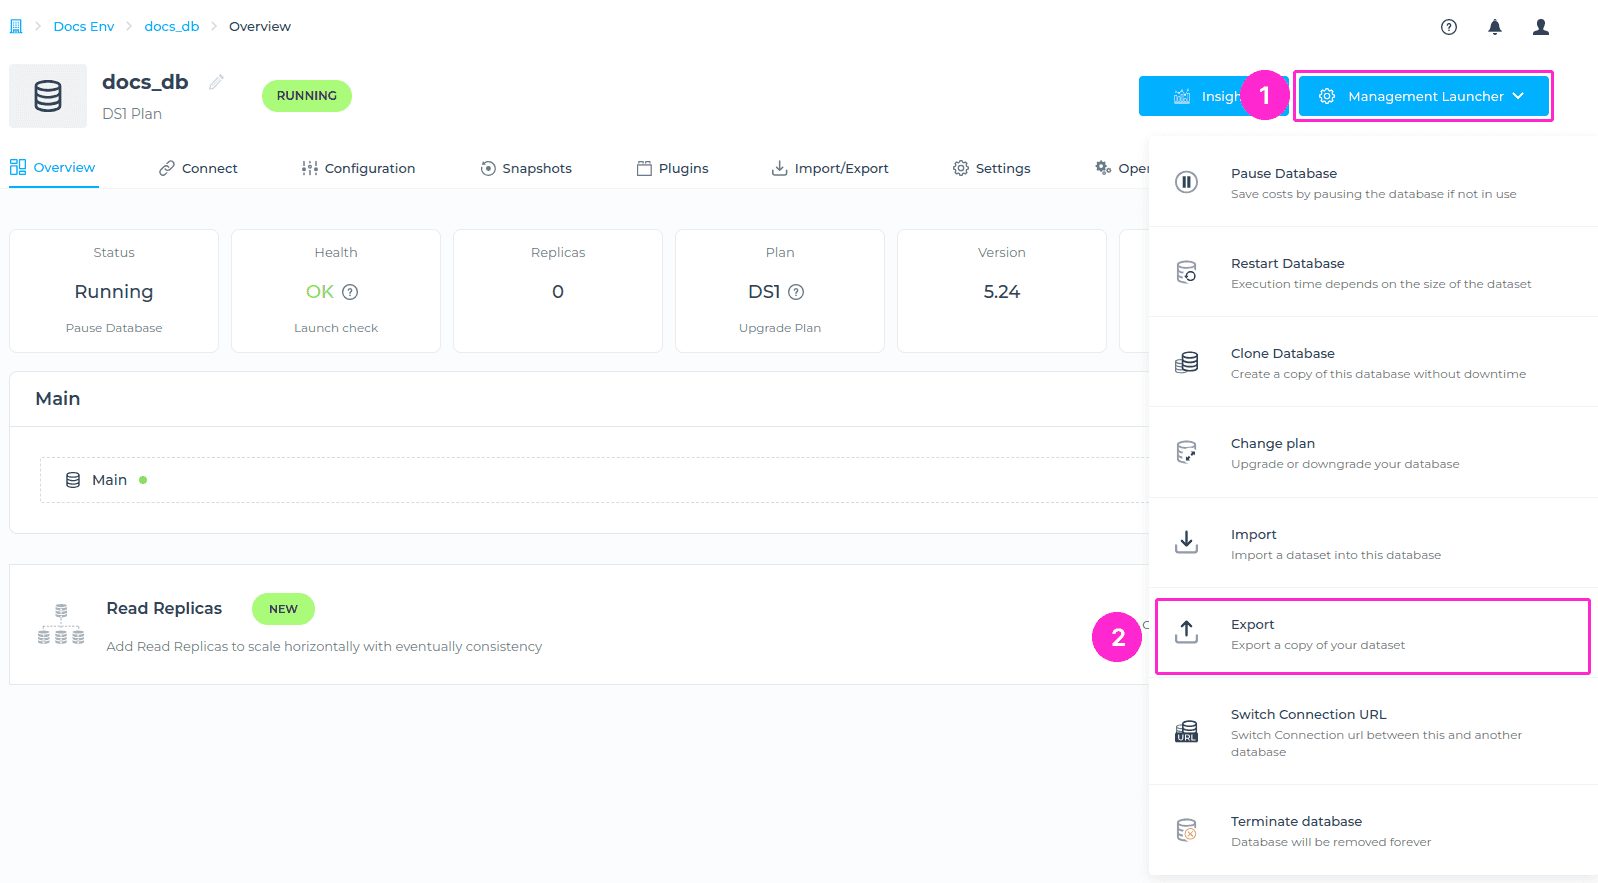
Please navigate to the Management Launcher at the upper right corner of your database interface > and click on the Export button.
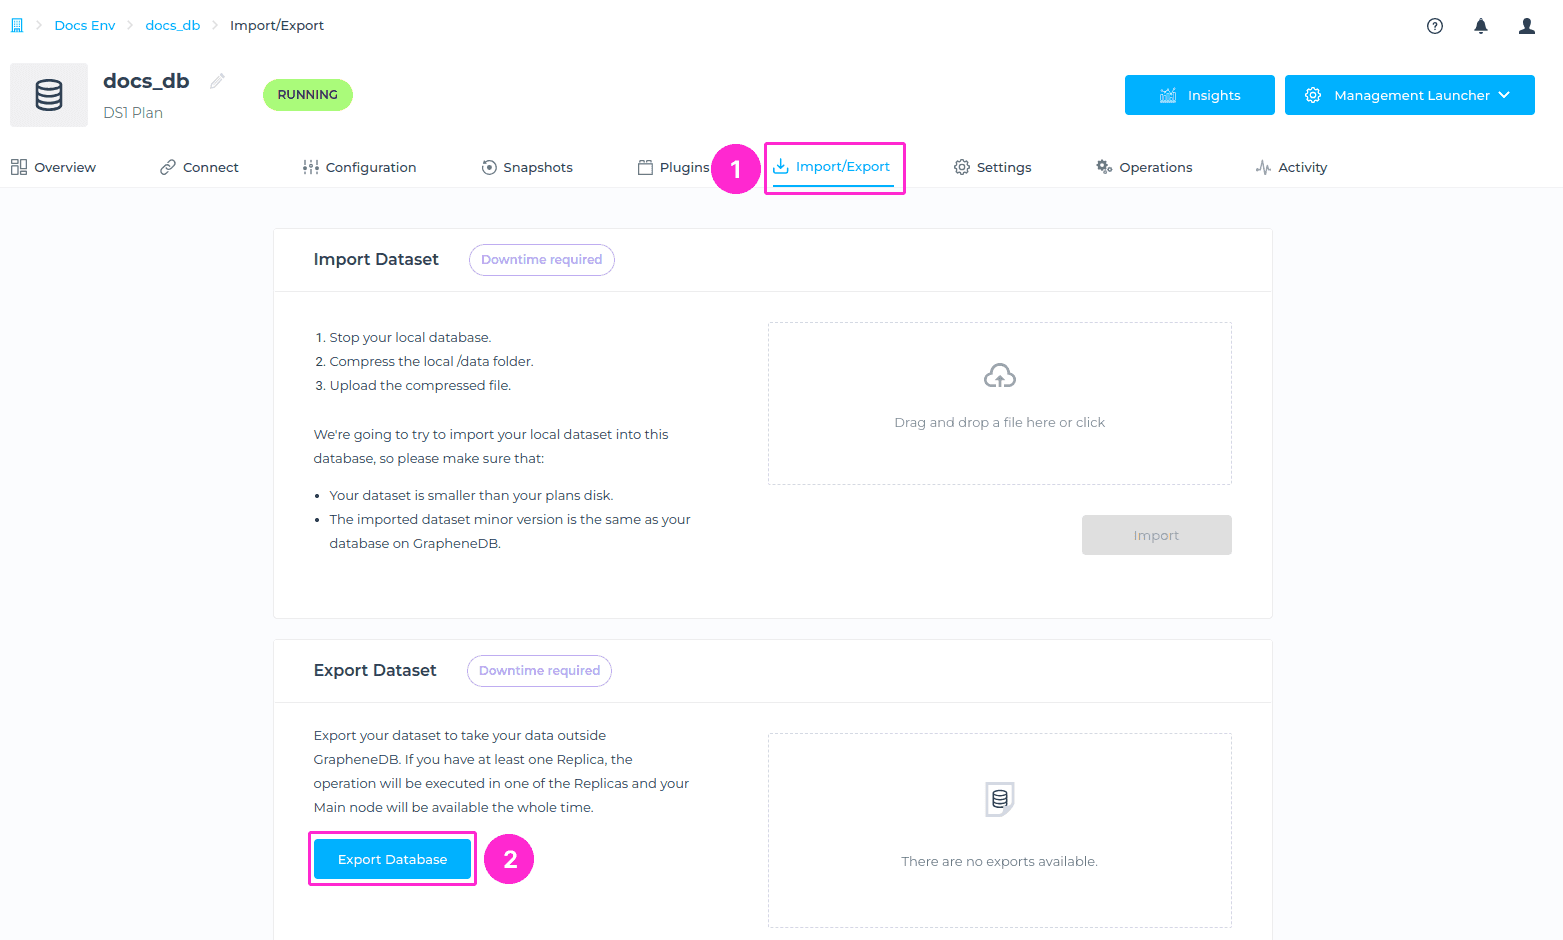
You can also navigate to the Import/Export tab, and click on Export Database button.
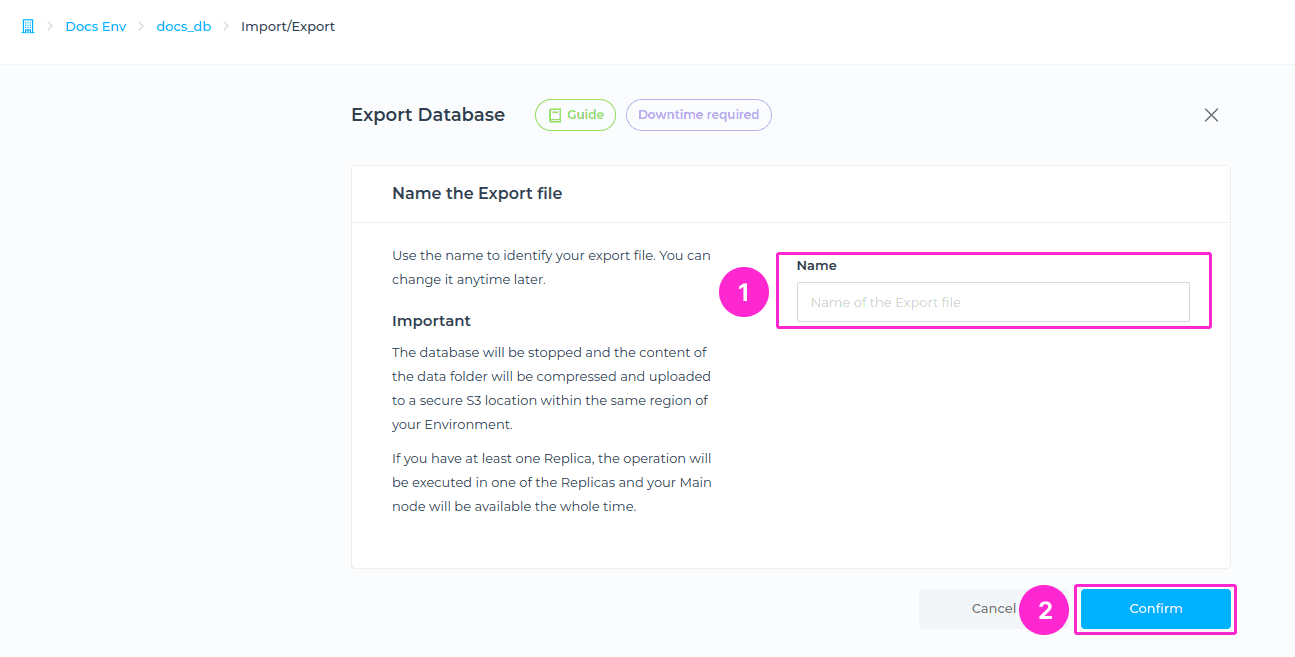
Now, you’ll be prompted to the next screen, where you need to add a name for the export file. To complete this action, please click on Confirm button.
ℹ️ Info
When naming the export file these conditions must be met:
- At least two characters long.
- At most thirty characters long.
- Can only contain alphabetical characters, numbers, underscore or dashes.
The database will be stopped and the content of the data folder will be compressed and uploaded to a secure S3 location within the same region of your Environment.
- Downtime will depend on the size of the dataset and the time the database will take to stop and start.
- The export file will be available for 24 hours. After that time window the download link will expire.
- You can have 2 concurrent exports. Please delete an existing one if you reach the limit.
Avoid downtime during export with Replicas
If you want to avoid downtime during exports, using Read replicas is a great option. When your database has replicas, the export automatically happens from the replica instead of the main node. This keeps the main node running without interruptions. The good news is that this process happens automatically without requiring any manual adjustments.
The only setting to keep in mind is ensuring that the main database can handle both read and write operations when replicas are unavailable. This ensures that your application remains fully functional even if a replica goes down. You can find more details around this in this article.
ℹ️ Info Read-replicas are available on DS3+ plans and version 5.
Download the export file
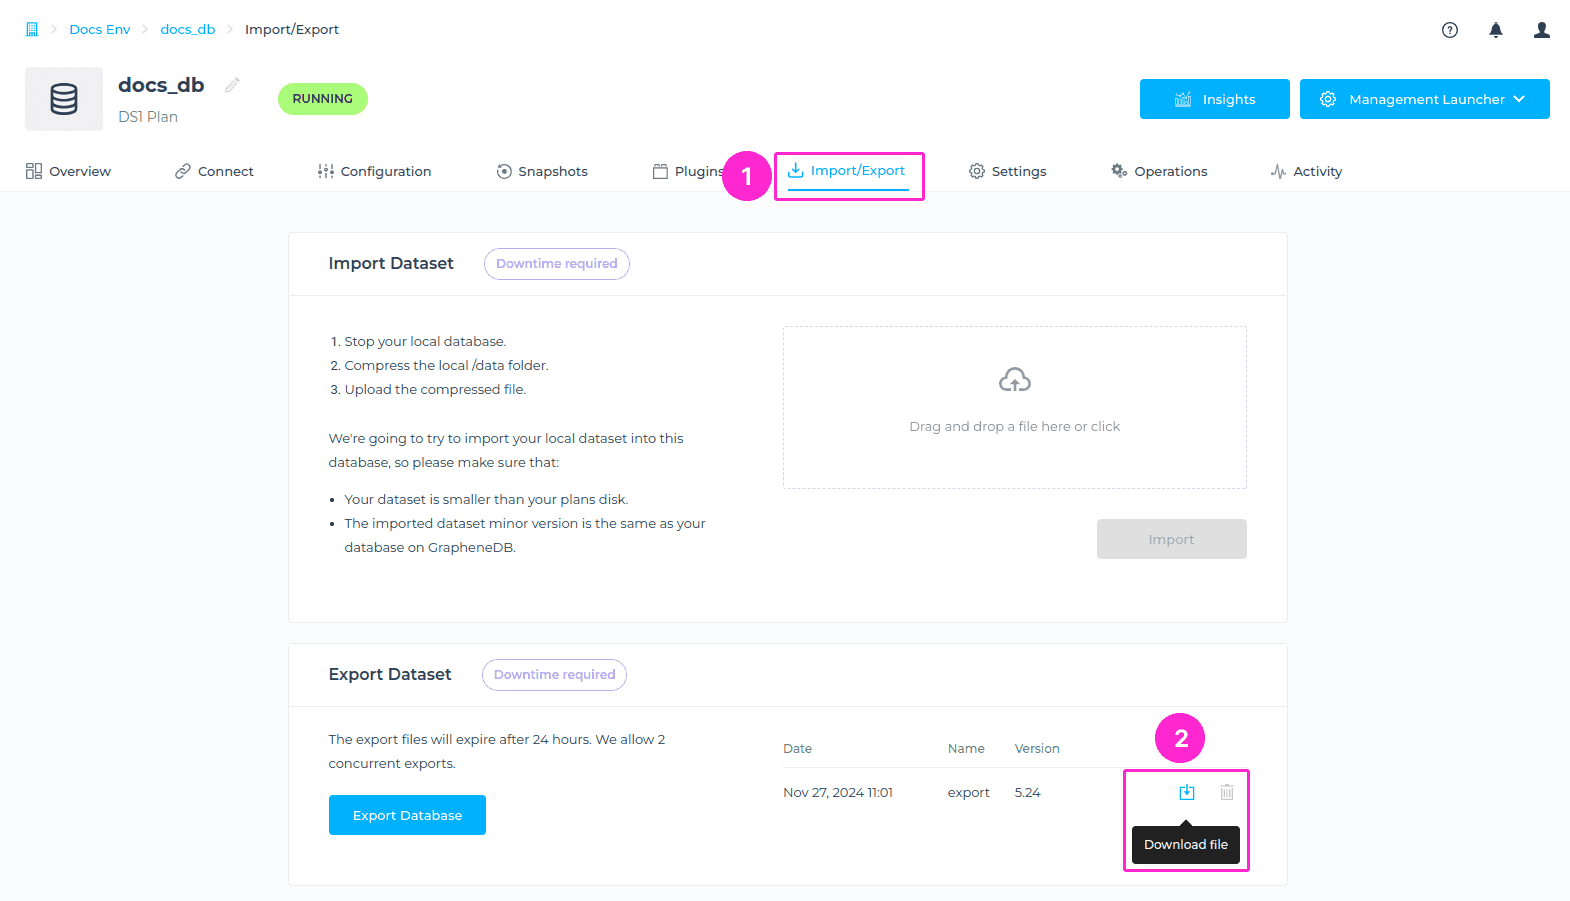
Once the export file is ready, you can download it from the Export section of the Import/Export tab by clicking on the Download file button.
Install Neo4j Community edition on your device
To begin, download and install the Neo4j Community Edition from the Neo4j download center. Make sure that the major and minor version of your local installation matches with the major and minor version or your GrapheneDB instance export file. You can manually edit the download link to match the version you need.
Extract the exported file
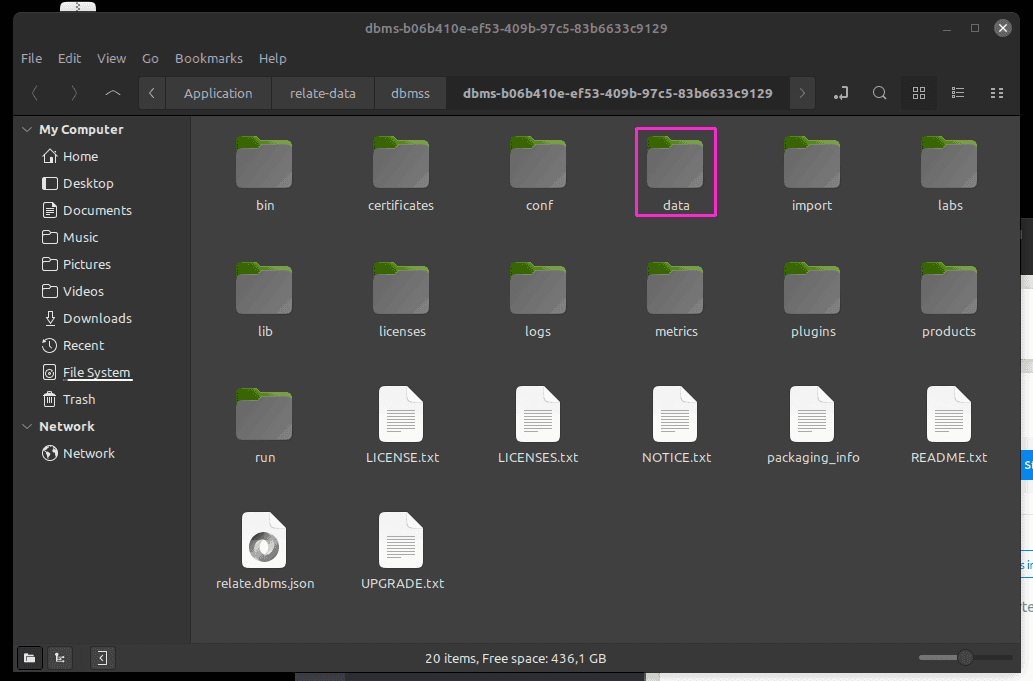
The next step is to extract the contents of the export file from GrapheneDB. This step is essential as the compressed file contains the critical data directories, transactions and databases, needed for a successful import into your local Neo4j instance. Here’s an example of the uncompressed export file opened on our device.

Stop local Neo4j
Ensure Neo4j is stopped before making changes to its data folder. Here’s our example command for Linux:
sudo ./neo4j stopCopy extracted data folder to the Neo4j directory
Now, replace the entire data folder by copying the contents of the extracted data from your export file. Here’s our example command for Linux, please make sure to know where you data folder is extracted and that you use correct path:
sudo cp -r /home/jovana/Desktop/data/* /opt/neo4j/data/Set the correct permissions. This will ensure that the Neo4j process has the necessary permissions to access the data folder.
sudo chown -R neo4j:neo4j /opt/neo4j/dataStart Neo4j
After replacing the data, the final step is to start your local Neo4j instance and to verify data. Here’s our example command for Linux:
sudo ./neo4j startYou can open Neo4j Browser to verify that the data matches with your GrapheneDB instance by opening http://localhost:7474/browser/.
To verify the Neo4j status, you can use this command:
sudo ./neo4j statusThis will display whether Neo4j is active (running), inactive, or failed.
To view the Neo4j log you can use the following command in your terminal:
sudo cat /opt/neo4j/logs/neo4j.logCreate a local database in Neo4j Desktop
Create a local database in Neo4j Desktop with your password of choice. Next, start the database.
Extract the exported file
The next step is to extract the contents of the export file from GrapheneDB. This step is essential as the compressed file contains the critical data directories, transactions and databases, needed for a successful import into your local Neo4j instance. Here’s an example of the uncompressed export file opened on our device.
Stop your Neo4j Desktop database
Now, before proceeding with the data import process, it is essential to stop the local Neo4j instance you intend to use as the destination database. This step is critical for maintaining data consistency and preventing potential conflicts or errors during the import. Attempting to load an exported file into a running database may result in incomplete data restoration, corrupted files, and failure of the import process.
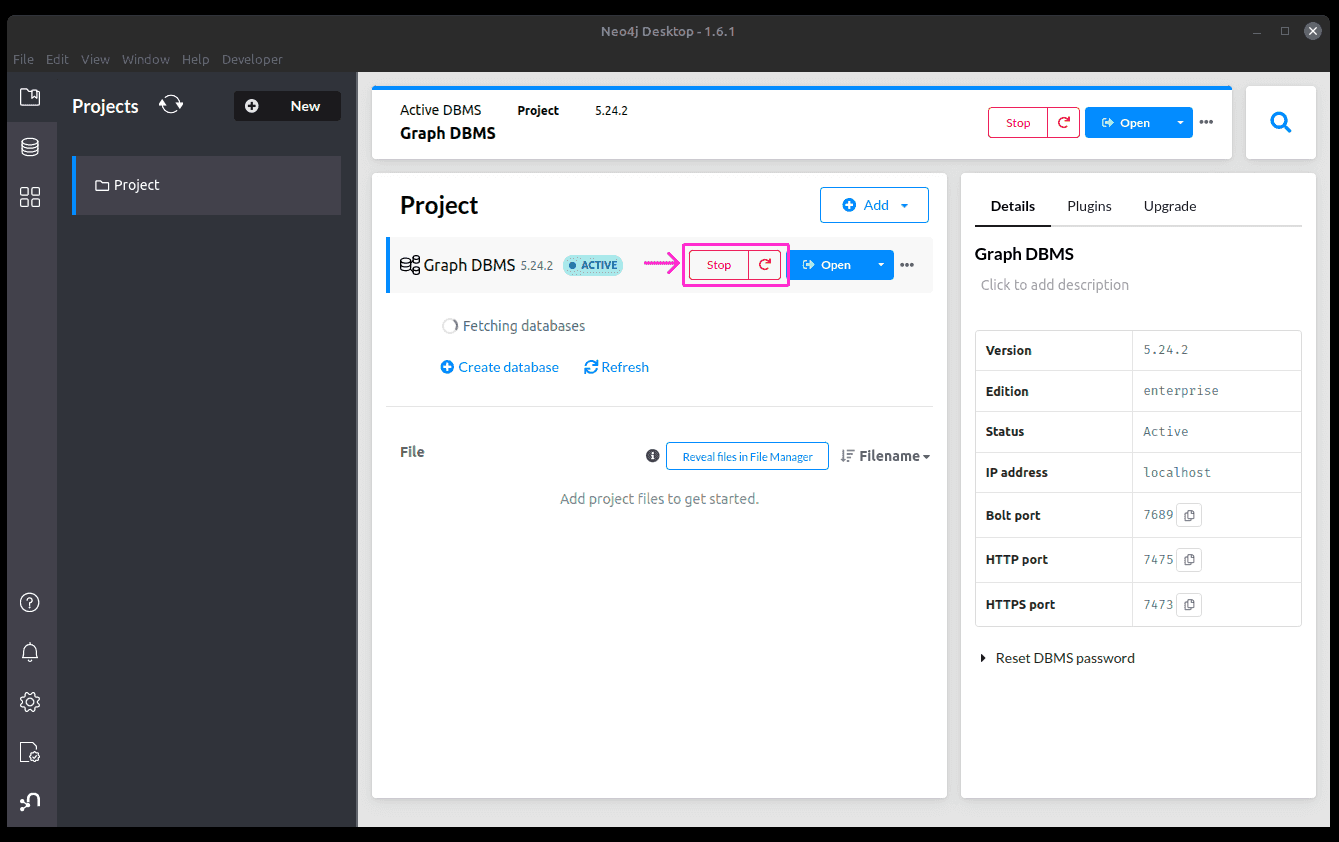
To stop the local database simply click on Stop button.
Locate the local data folder
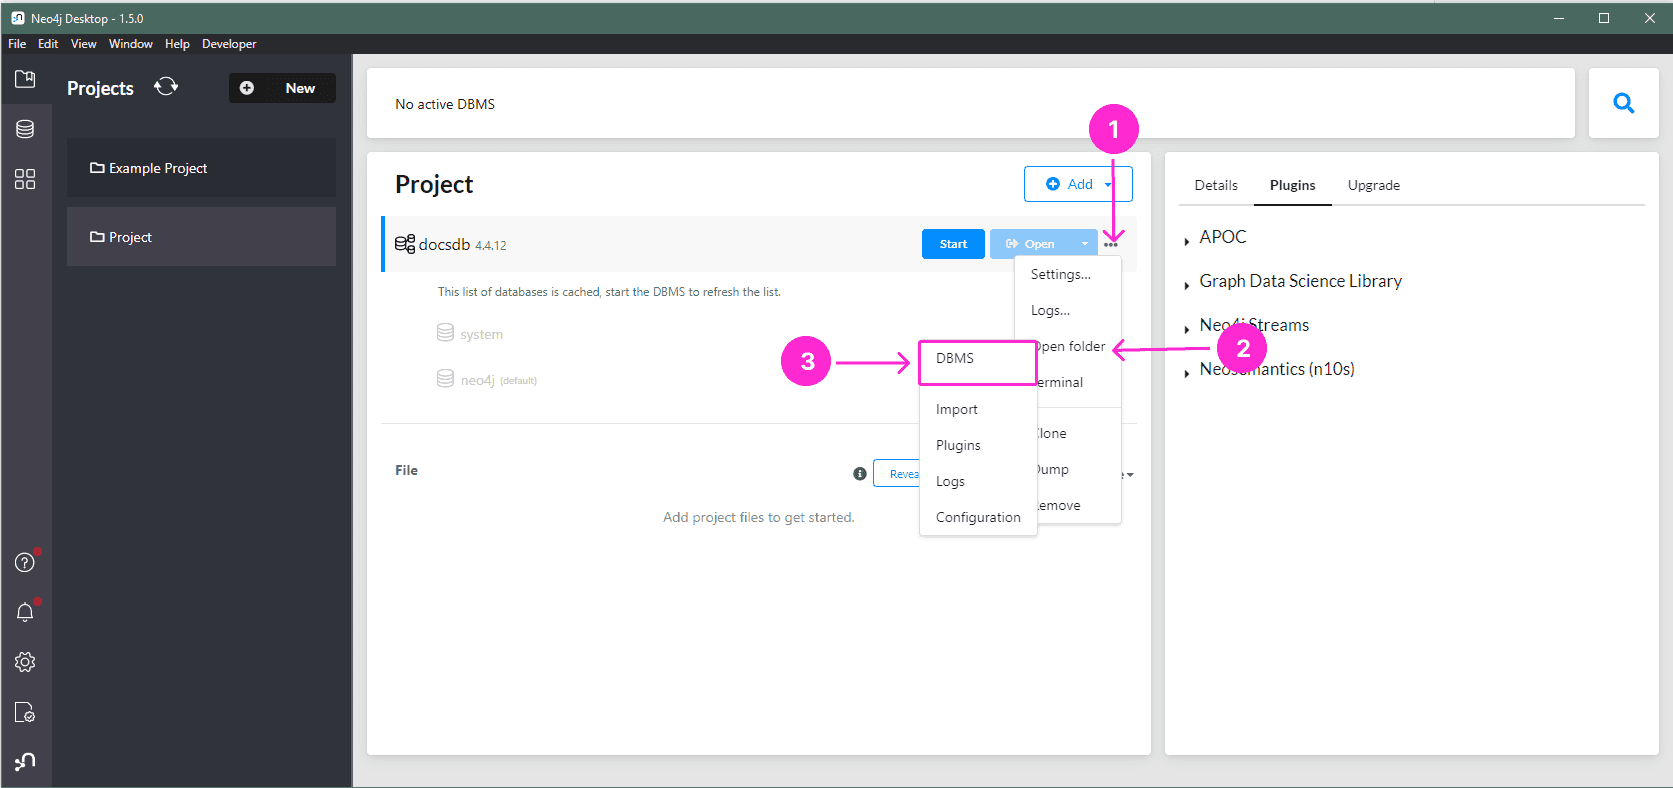
In our example we are using Neo4j Desktop and local instance there. To locate the data folder, please click on the three dots next to your database > Open folder > DBMS. That opens the data folder location.
Replace the local data folder with files from export
The next step is to replace the respective contents of the local data folder with the respective files from the exported dataset. This process ensures that your local Neo4j instance reflects the exact state of the database exported from GrapheneDB.
By copying the transactions and databases directories from the uncompressed file into the local recpective folders, you’ll overwrite the existing database files while preserving the necessary directory structure. Please replace the following:
- replace the
neo4jfolder in/databaseswith contents of the/databases/neo4jfrom export file - replace the
neo4jfolder intransactionswith contents of the/transactions/neo4jfrom exported file
Start your Neo4j Desktop database
The final step is to start your local Neo4j instance and to verify data. This action initiates the database with the newly imported data, making it available for use. Once started, you can open Neo4j Browser to verify that the data matches with your GrapheneDB instance.