


Setting up your first Environment
All databases at GrapheneDB are deployed into Environments. Environments are regional, thus they are restricted to a single AWS region. Environments are a way to securely group deployments and configure same network access rules for them (IP Whitelist and VPC peering). Additionally, you can configure which members will have access to Environments and their databases.
You can choose an environment type, which is a way to categorize the different categories of environments you have, eg. staging, production, etc. You can choose the Environment Type by assigning a color to it, and you can provide access to that specific Environment to Operators of your Organization.
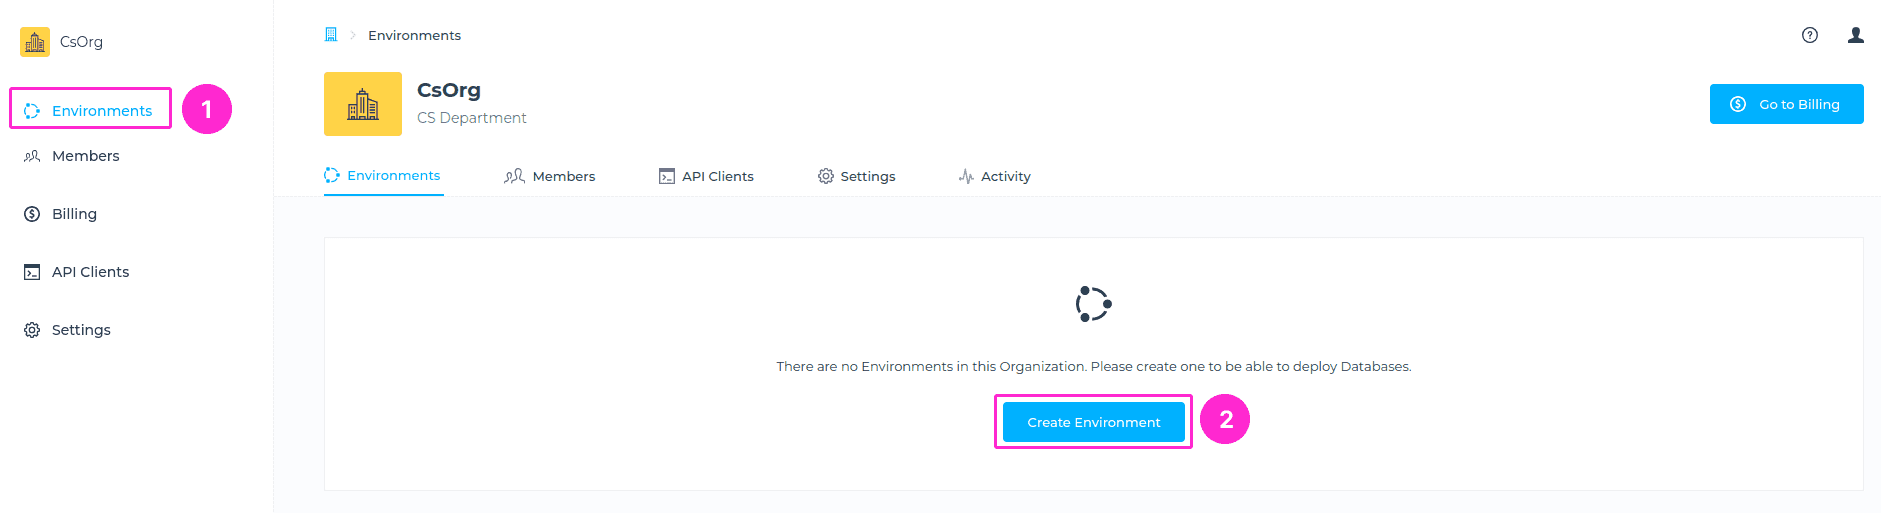
To create your first Environment, simply navigate to the Organization from the drop-down menu, go to the Environments tab, and click on the +Create Environment button.
You’ll be prompted to the next section where you will need to enter the Environment name, Type, Region, and IP address range. Once you set all the required fields, you can simply click on Confirm button to complete this action. Once that is done, you can proceed to create your first database.
ℹ️ Info
When naming the Environment these conditions must be met:
- At least two characters long.
- At most thirty characters long.
- Can only contain alphabetical characters, numbers, underscore or dashes.
For detailed instructions on managing the Environment, please follow this article.
Deploying your first database
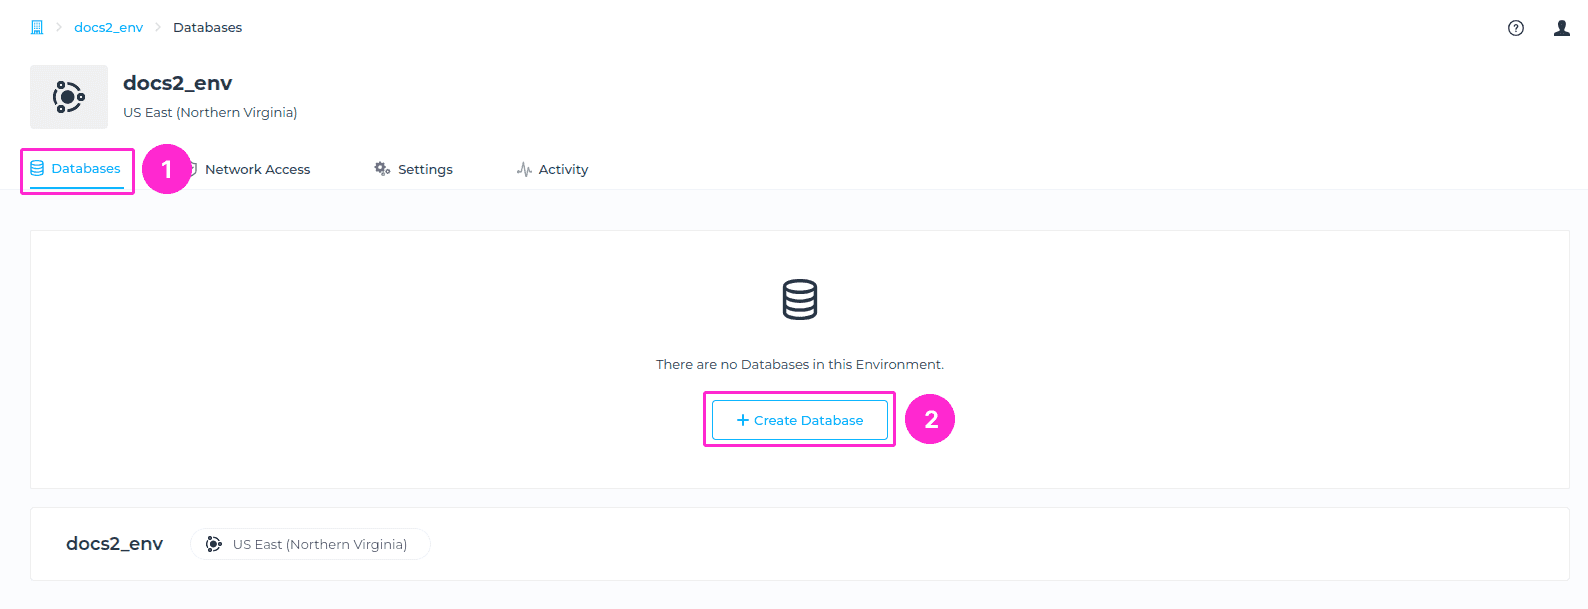
The database will be created in the AWS region you chose for your Environment. Once you’re in the Environment where you want your database deployed, navigate to the Databases tab > + Create database button.
There are several requirements you’ll need to select before the instance can be created:
- choose Version.
- choose Plan for the database.
- choose Snapshot policy or uncheck the box if you don’t need a snapshot policy.
- choose a Name for your database.
ℹ️ Info
When naming the Database these conditions must be met:
- At least two characters long.
- At most thirty characters long.
- Can only contain alphabetical characters, numbers, underscore or dashes.
Before you click on the Create Database button, you’ll be able to see an overview of the database specifications as well as the price for it.
For detailed information on Managing your databases, please follow this link.
Connecting to your database
To be able to connect to your database, first, you need to allow access by adding the IP Whitelist rule or VPC peering. To allow access to all IPs, simply add the 0.0.0.0/0 entry. Please find the details on IP Whitelisting here.
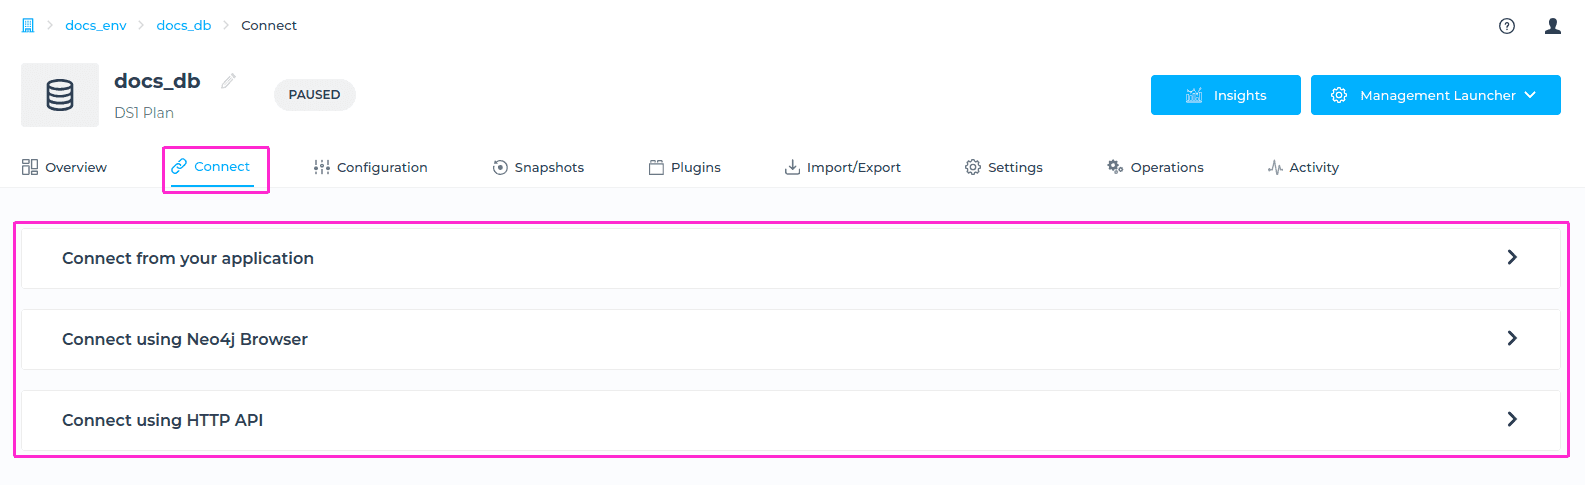
There are several ways of connecting to your database, and one of them is using a Neo4j Browser. Neo4j databases come with a built-in, interactive UI that allows you to explore your database. Neo4j Browser is a developer-focused tool that allows you to execute Cypher queries and visualize the results. Simply navigate to the Connect tab > and either launch the Neo4j Browser or copy the URL of the Neo4j Browser.
Since the database is newly provisioned, you will need to create a new database user to connect to your database. Please take a look at our article on managing users.