How can I download a backup?
In a case that you need to download a backup of your database, and you’re wondering how to do it, since we’re not creating automatically an export file for snapshots, it can be easily achieved by using our Export feature. For additional context, we are dealing with snapshots only, and not backup files, which allows us to offer different Snapshot policies with more frequency and retention.
The snapshot is ready within minutes (even for bigger datasets) and restored also in minutes. Your data will never leave your region of choice, since snapshots are natively created by AWS in the same region where your database is hosted.
Process
Since the export requires downtime, the suggested process would be to use new database for export purposes. We’d like to point out that this entire process can be automated with GrapheneDB API, to allow you for smooth automation as per your needs.
Please check the steps described below to download the export file which enables you to save your backup file where you want it.
1. Create On-demand Snapshot for origin database
ℹ️ Info
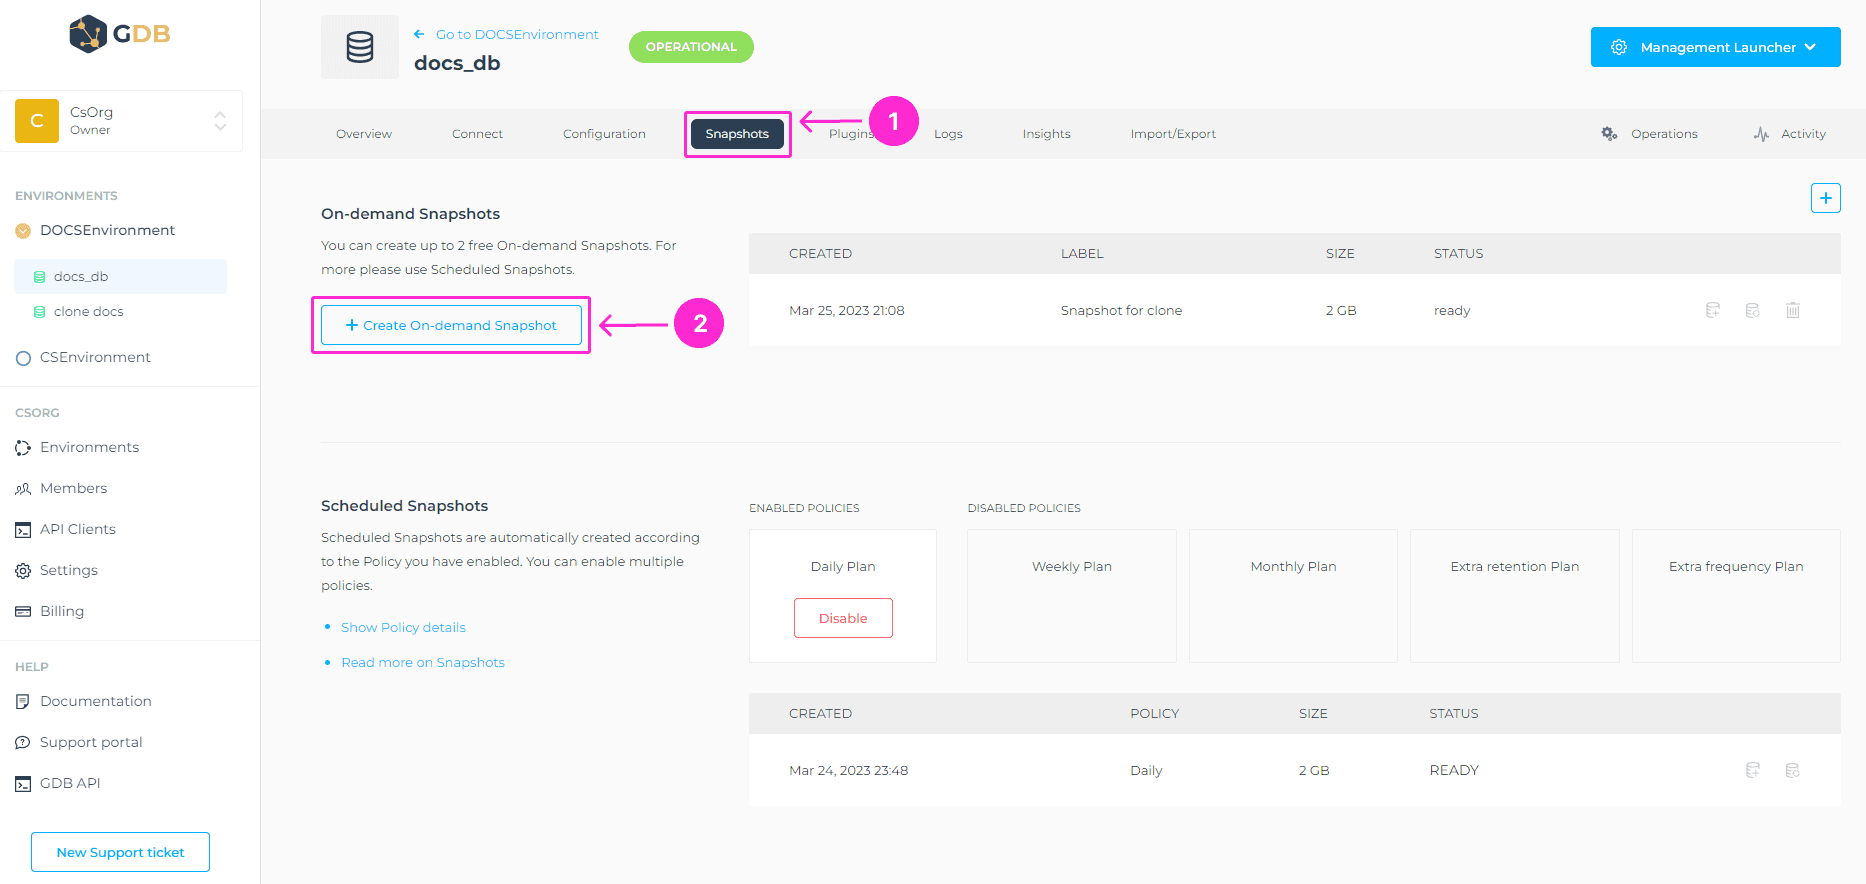
You can create up to 2 free On-demand Snapshots. If you run out of free slots, you can delete one of the existing on-demand snapshots and create a new one.
To create an On-demand snapshot, navigate to the Snapshots tab of your database > + Create On-demand snapshot button. You’ll be prompted to the next screen, where you can identify the Snapshot with a label. This field is not mandatory and will be autocompleted with a default if left empty. To create it, click on the Create button.
You’ll be able to see the progress of this operation, in the Operations tab of your database. The On-demand Snapshot will have a Ready status once available.
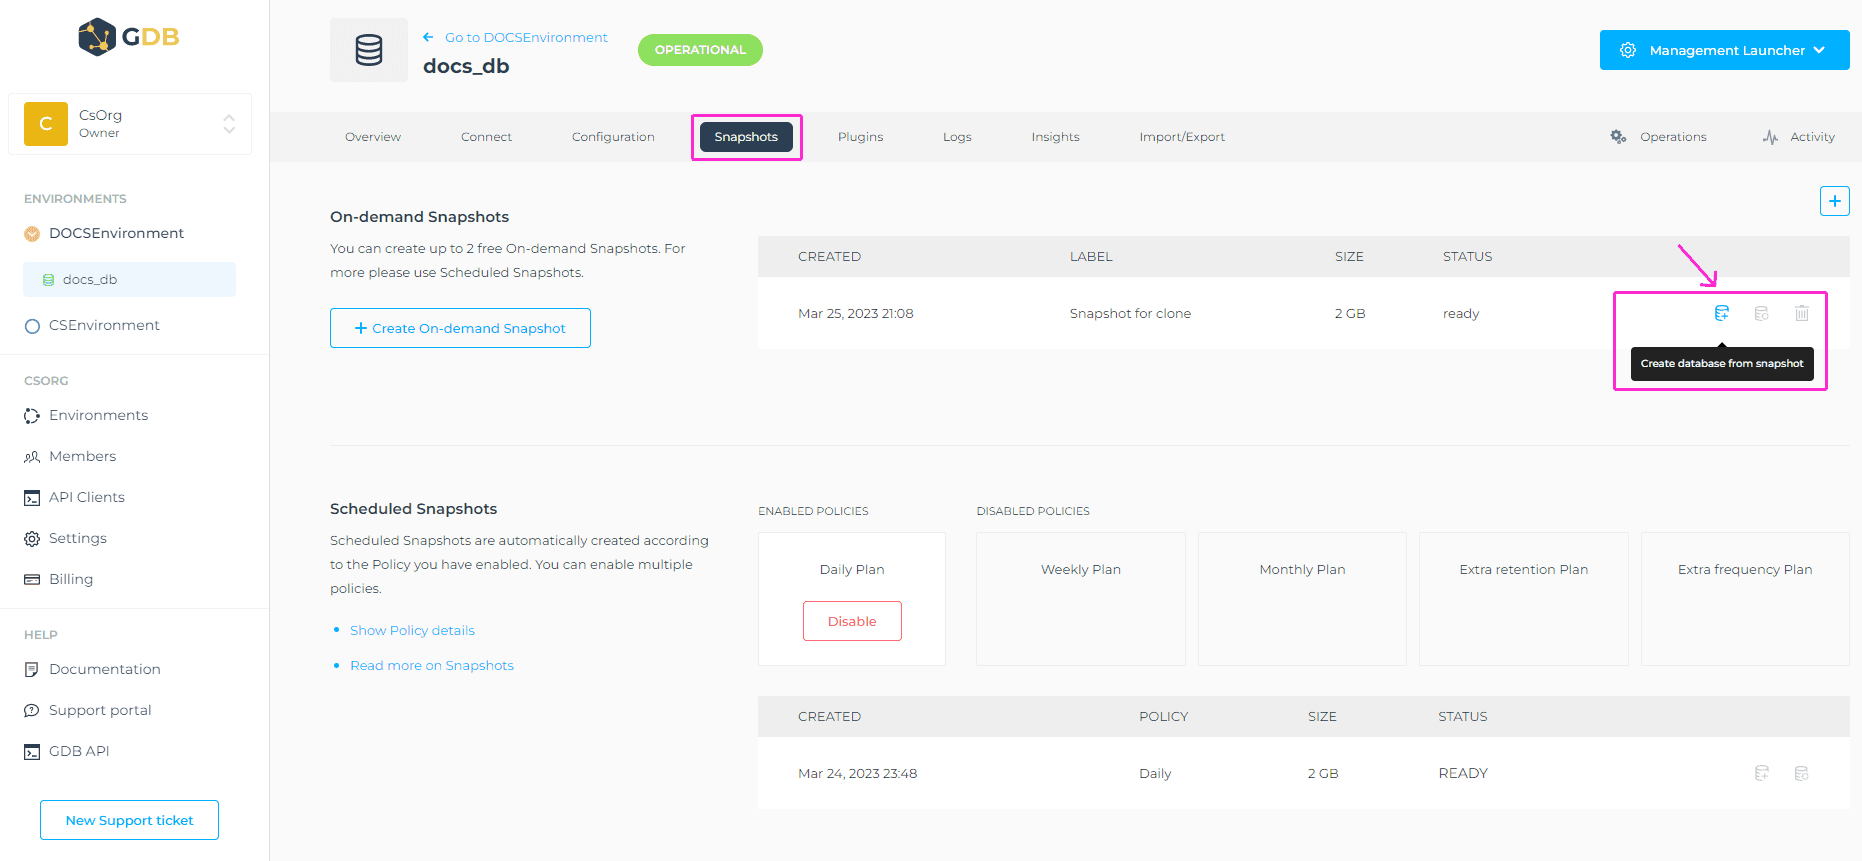
2. Create new database out of snapshot
To initiate this operation, navigate to the Create database from snapshot icon on the right-hand side of the chosen Snapshot.
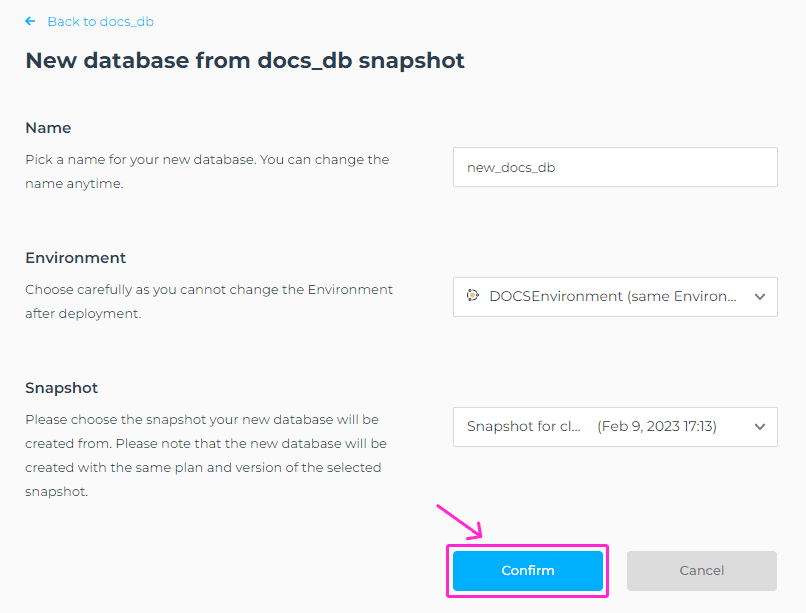
You’ll be prompted to the next screen, where you’ll be able to select:
- Name of the new database
- Environment (from a list of environments that the user has access to) - choose carefully, as you cannot change the Environment after deployment.
- A different snapshot if available.
You’ll be able to see the progress of this operation in the Operations tab of your database.
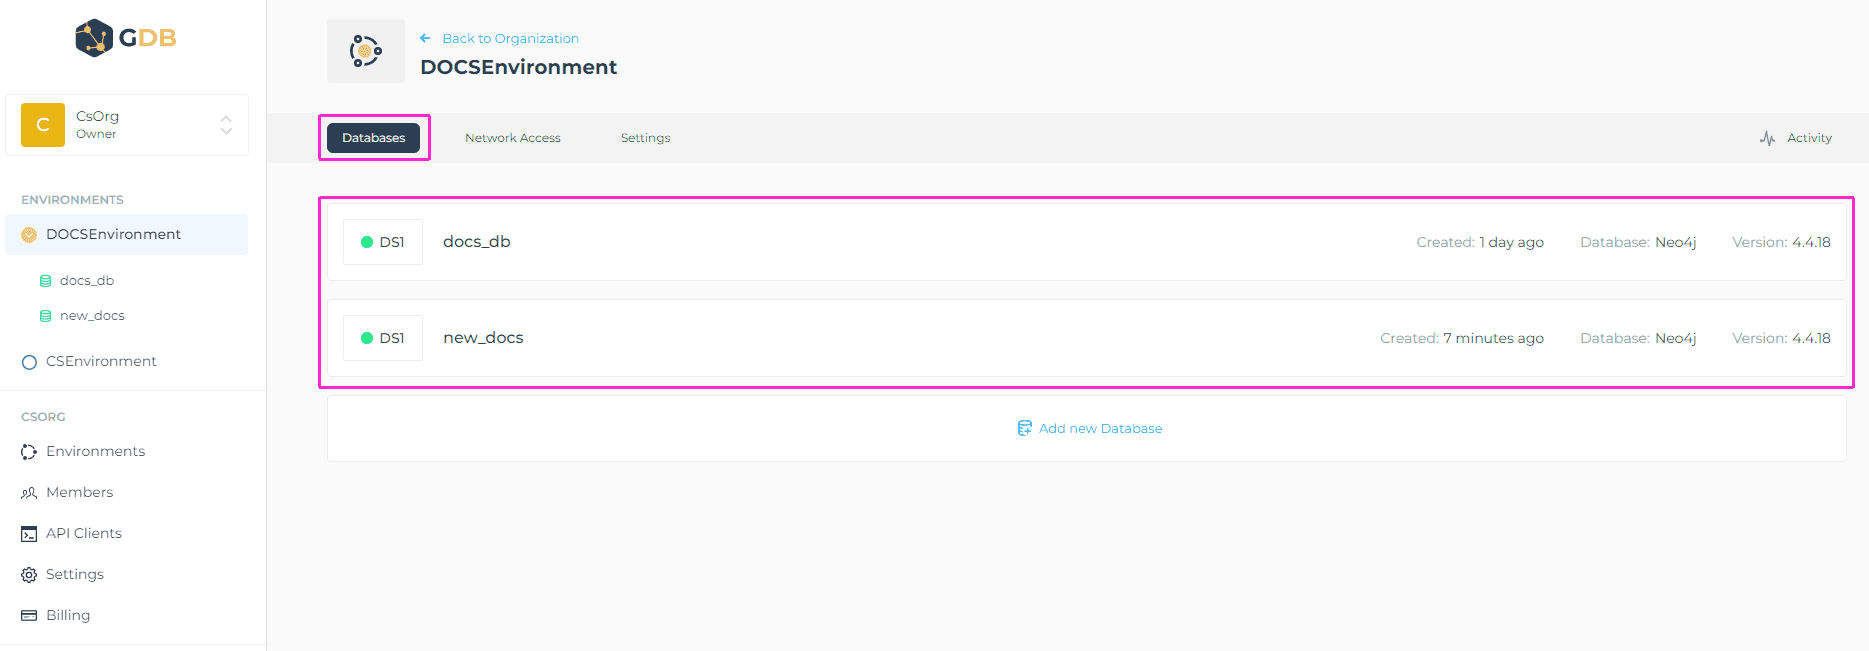
When everything is ready, you’ll see the newly created database in the list of the databases of the Environment you chose, with the Operational status.
3. Export from new database
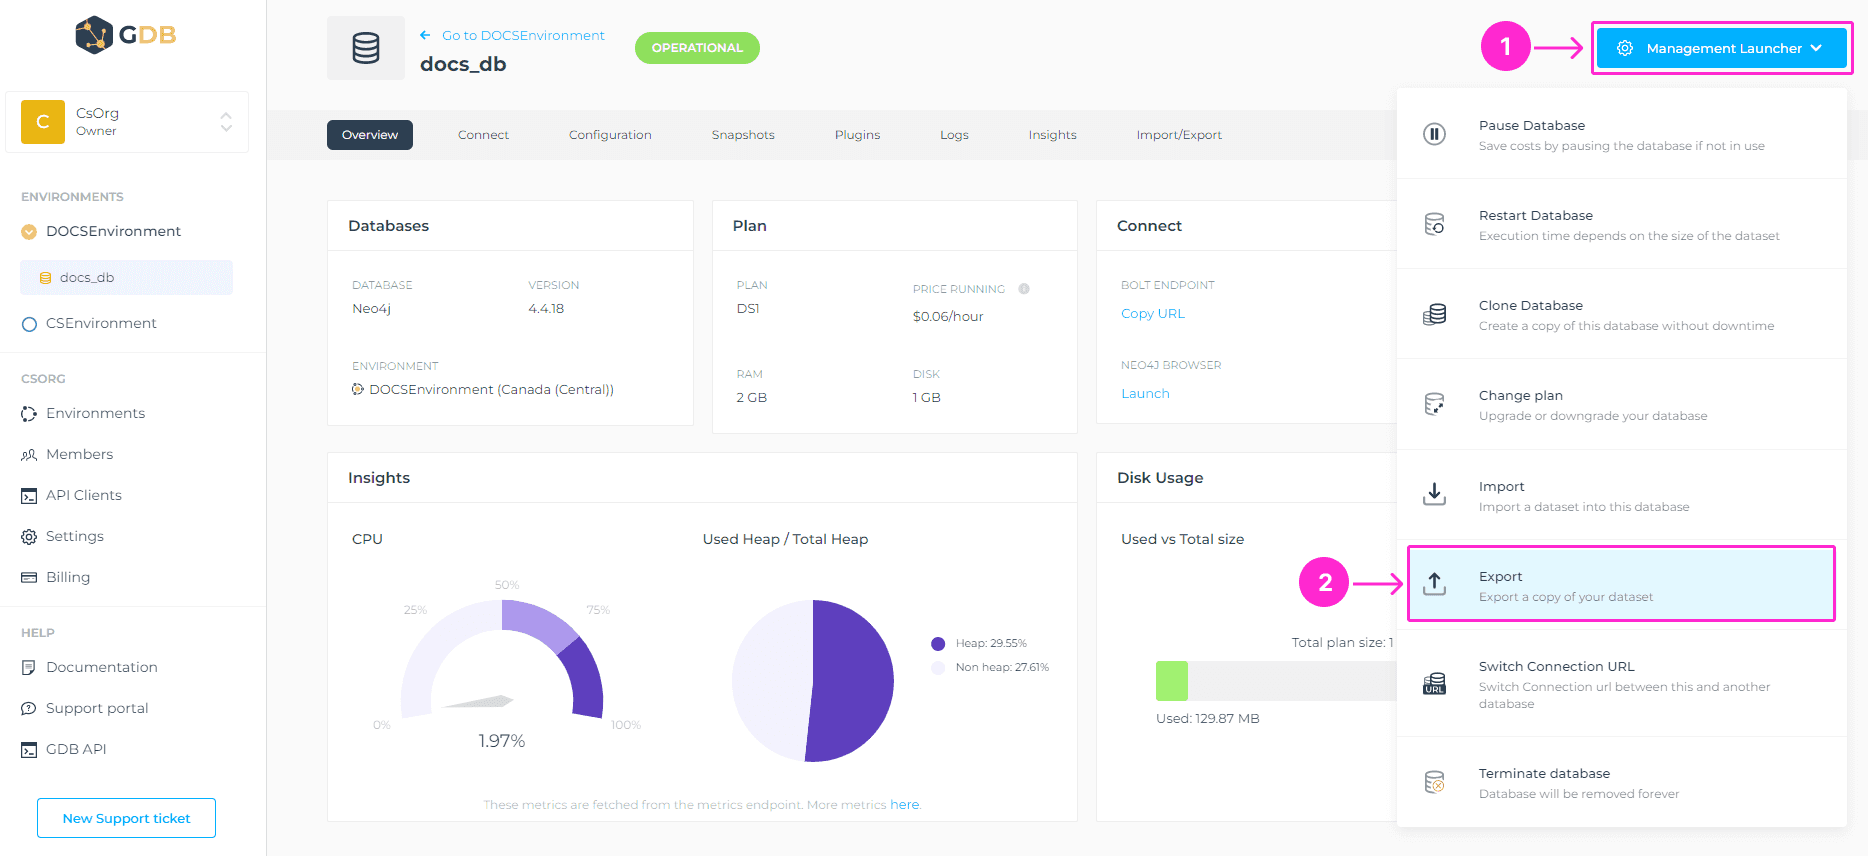
Please navigate to the Management Launcher at the upper right corner of your new database interface > and click on the Export button.
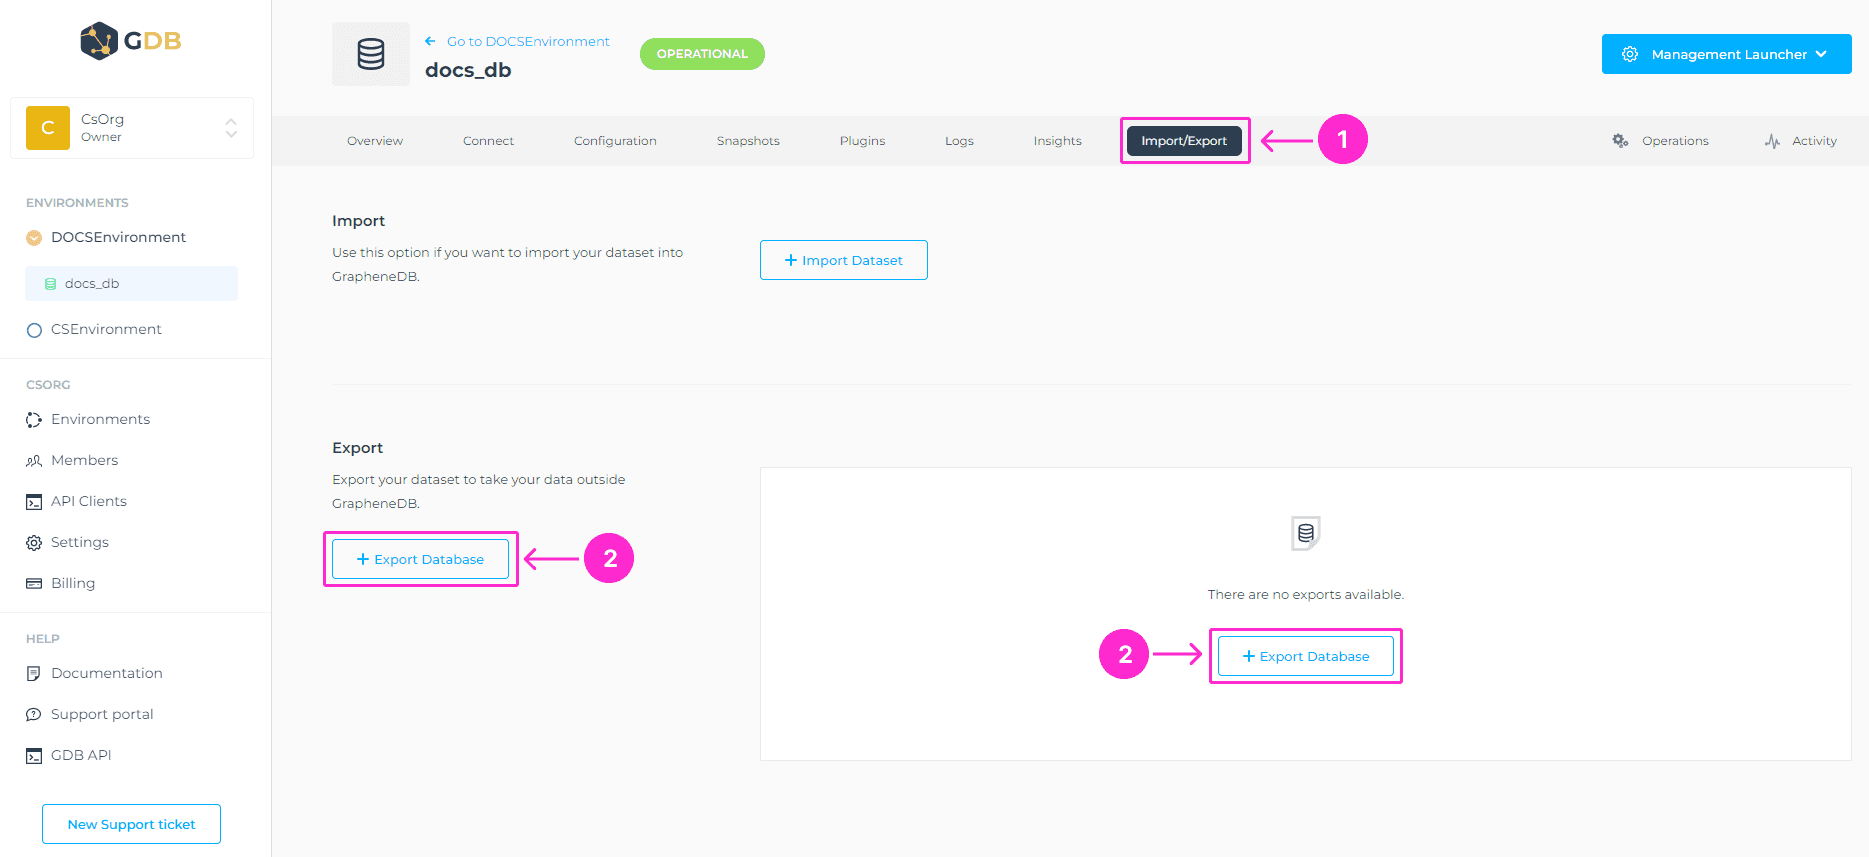
You can also navigate to the Import/Export tab, and click on +Export Database button.
Now, you’ll be prompted to the next screen, where you need to add a name for the export file. To complete this action, please click on Confirm button.
ℹ️ Info
When naming the export file these conditions must be met:
- At least two characters long.
- At most thirty characters long.
- Can only contain alphabetical characters, numbers, underscore or dashes.
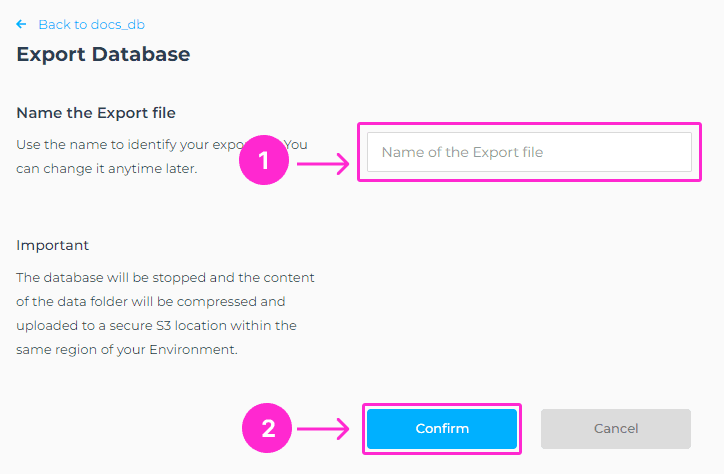
The database will be stopped and the content of the data folder will be compressed and uploaded to a secure S3 location within the same region of your Environment.
Downtime will depend on the size of the dataset and the time the database will take to stop and start. The export file will be available for 24 hours. After that time window the download link will expire. You can have 2 concurrent exports, so please delete an existing one if you reach the limit.
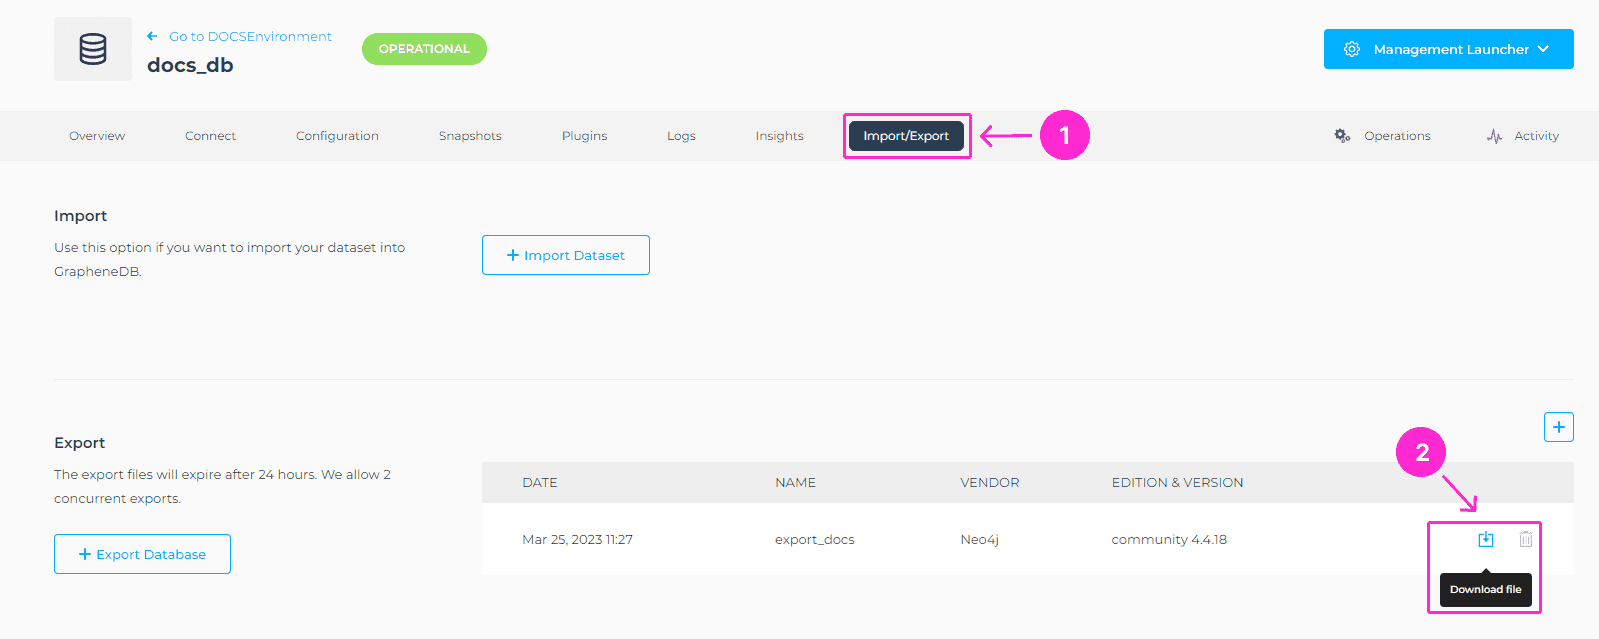
4. Download the export file
Once the export file is ready, you can download it from the Export section of the Import/Export tab by clicking on the Download file button.
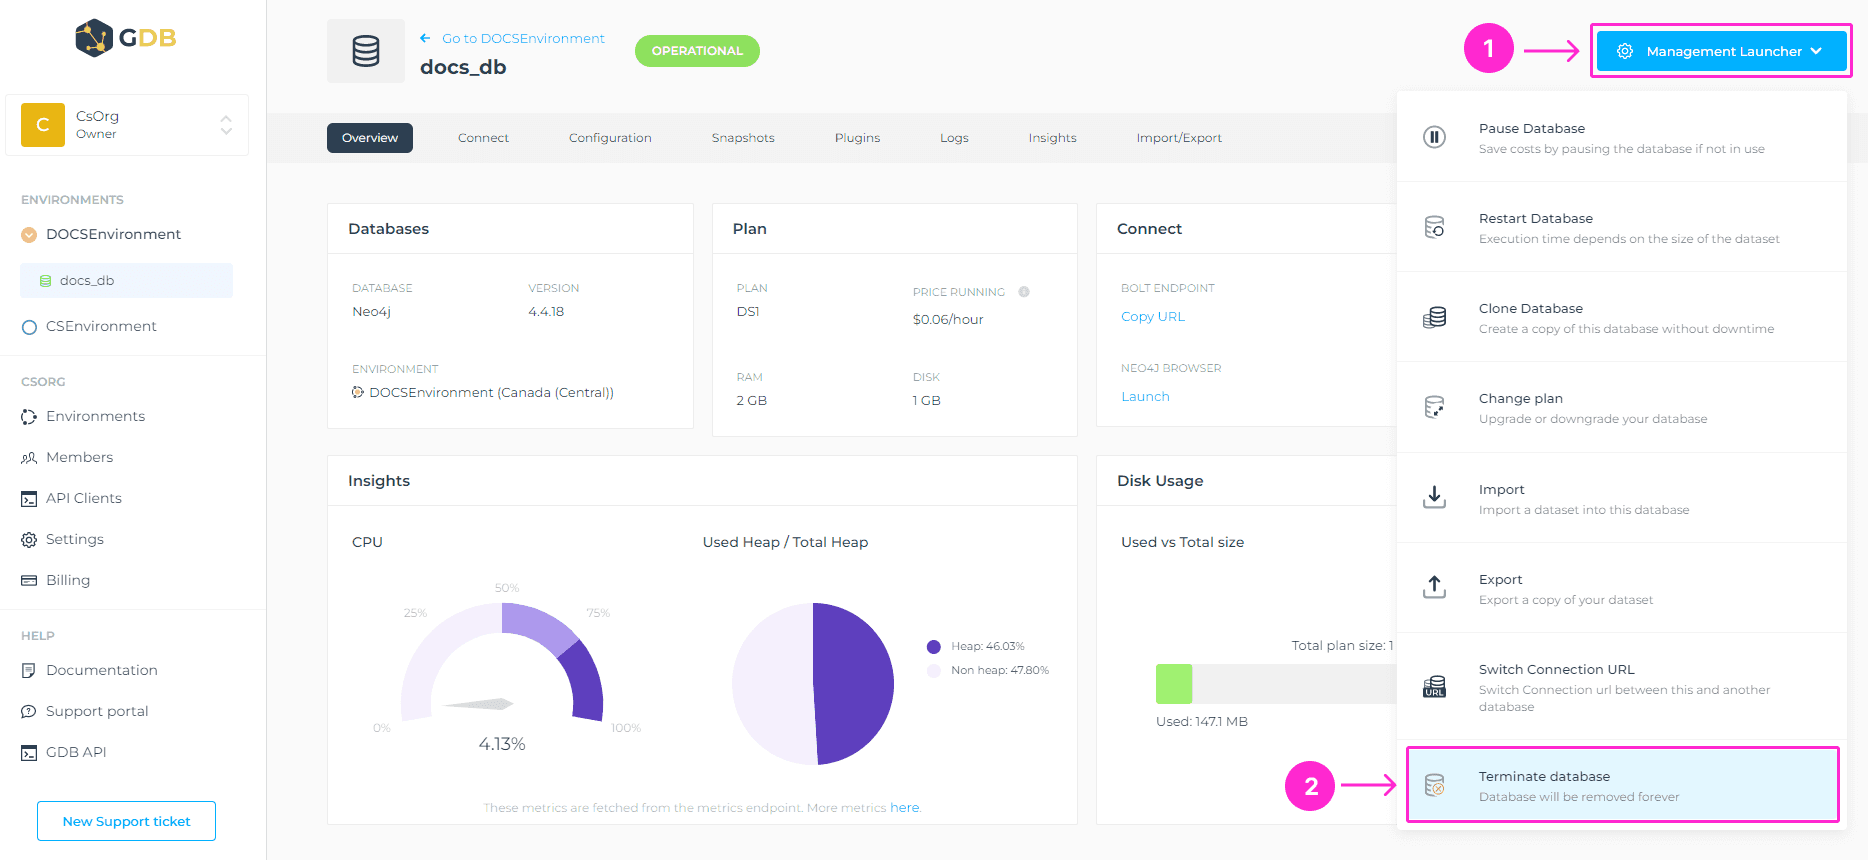
5. Delete the new database
To delete your database, navigate to the Management Launcher menu, and select Terminate Database. You’ll be prompted to the modal window where you’ll need to enter the database name and click on the Terminate Database button to complete this action.
⚠️ Important
This action cannot be undone and will delete your database permanently.
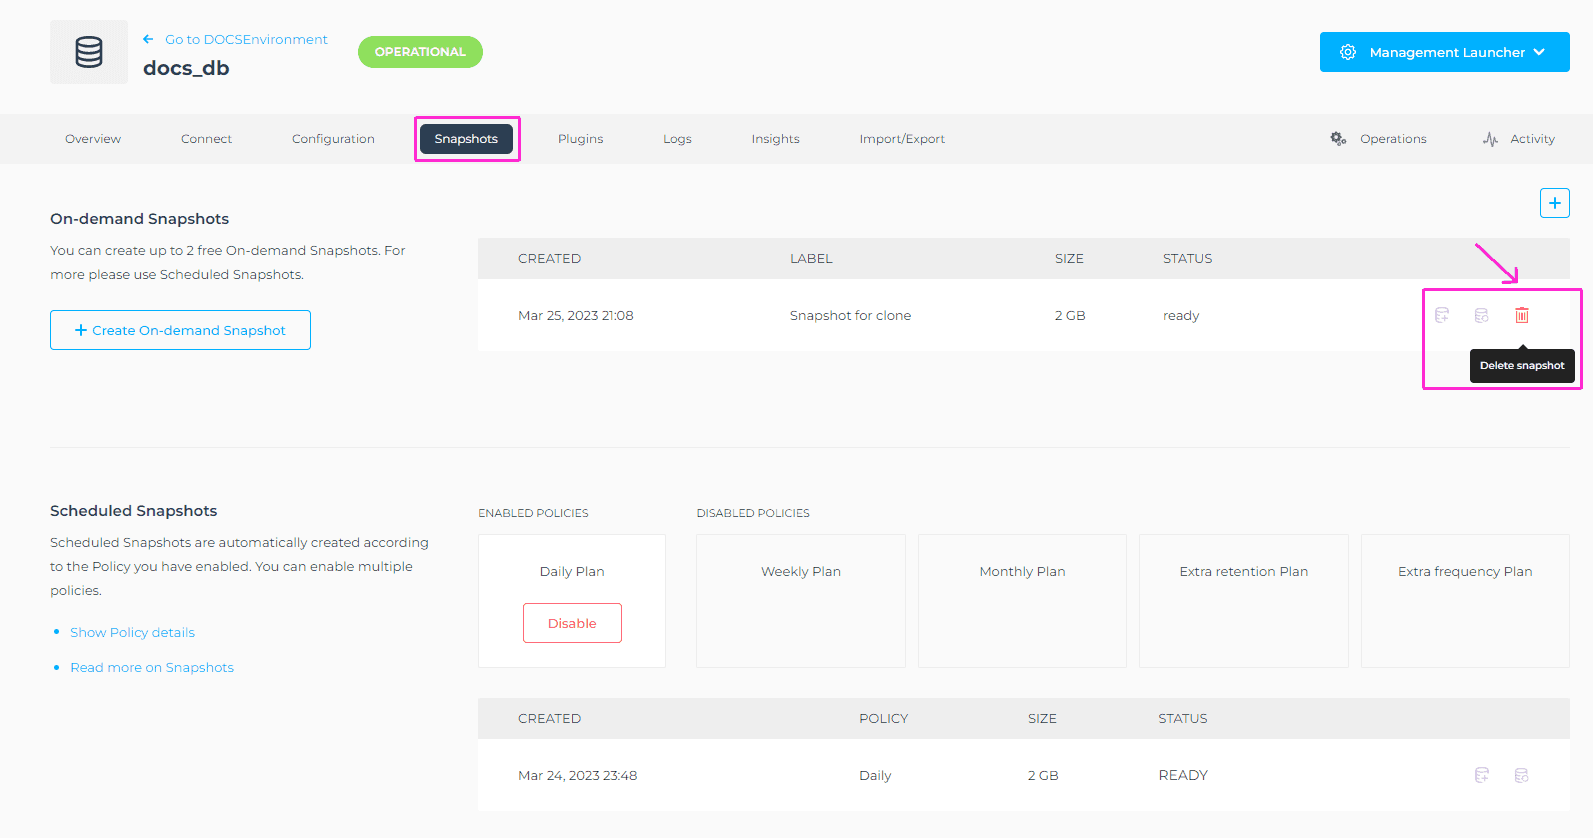
6. Delete On-demand snapshot
To delete the On-Demand Snapshot, navigate to the right-hand side of the Snapshot, and select the Delete snapshot icon. You’ll be prompted to the modal window, where you need to click the Confirm button to complete this action.