IP Whitelisting
You can grant access to a single public IP address or a collection of public IP addresses to all databases inside an Environment using IP Whitelisting. Basically, by using this functionality, you can reduce the threat surface of your application by limiting network access to only certain IP addresses.
⚠️Important
- If your plugin necessitates outbound traffic, for example, the APOC procedure to send data to an external ES server, you will be required to include the server’s IP address in your Environment’s IP Whitelist.
- Another option is to establish a peering connection with the external server.
- If neither of these alternatives is feasible, you will need to whitelist all IP addresses, meaning that you’ll need to add 0.0.0.0/0 to the Environment’s Whitelist.
You can also combine the IP Whitelisting with VPC peering in case your infrastructure is deployed on AWS.
Adding new IP to the Whitelist
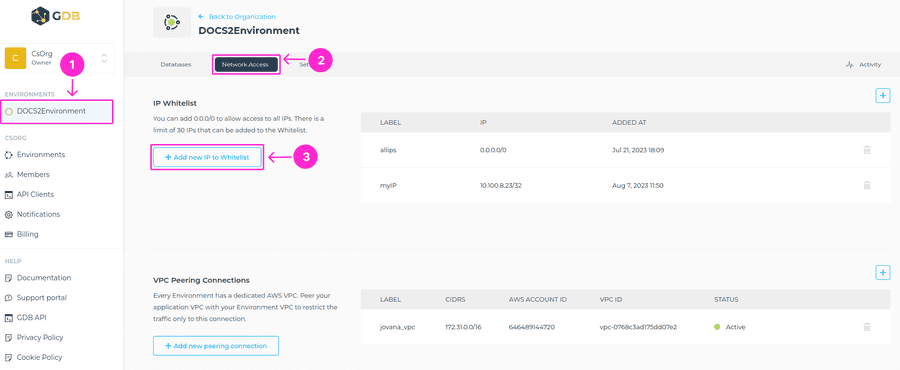
To add the IP to the Whitelist in the respective Environment, navigate to the Network Access tab > + Add new IP to Whitelist. You can add 0.0.0.0/0 to allow access to all IPs and there’s a limit of 30 IPs that can be added to the Whitelist.
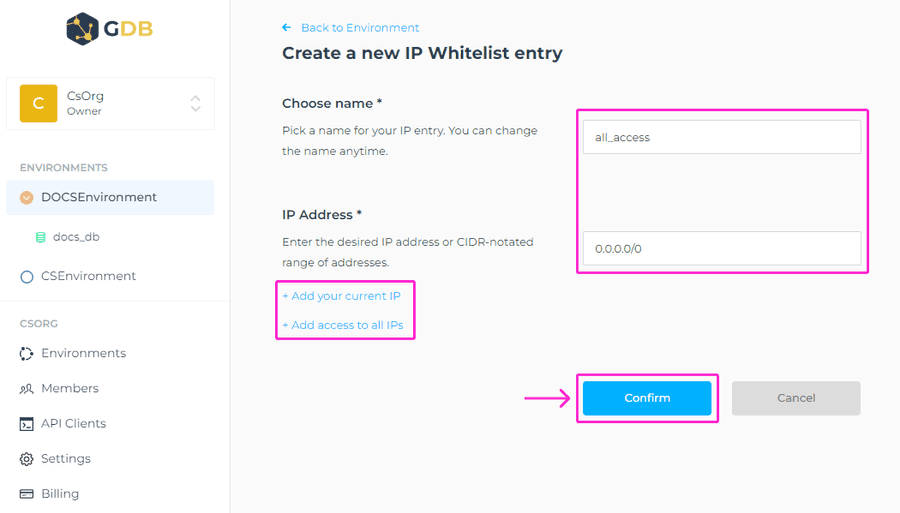
When you click on +Add new IP to Whitelist, the new screen will show, where you’ll need to choose a name for the IP Whitelist entry and add desired IP address or CIDR-notated range of addresses.
ℹ️ Info
When naming an IP entry these conditions must be met:
- At least two characters long.
- At most thirty characters long.
- Can only contain alphabetical characters, numbers, underscore or dashes.
You can also select the button +Add your current IP or +Add access to all IPs (0.0.0.0/0).
To save this setup, please click on Confirm button.
Your current public IP address is the same address that you are currently using with your internet browser.
⚠️ Important
Since public IP addresses are often shared, this can be especially dangerous when you are accessing from a public network, such as wifi from café or a network from a large organization (university, big corporation).
By allowing access from this IP address, you are allowing access for anyone else using the same public IP address until it is removed from the IP Whitelist. Be careful when adding your current public IP address to your whitelist.
Removing IP from the Whitelist
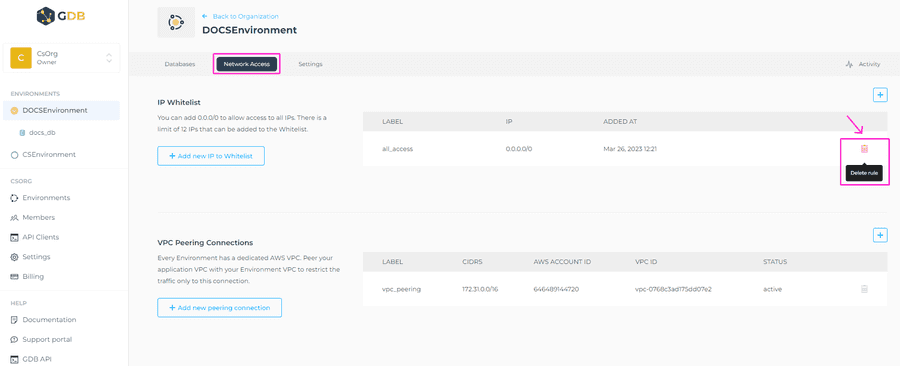
If you decide to remove any IP from the Whitelist, you can click on trashcan icon on the right-hand side, and delete that rule.
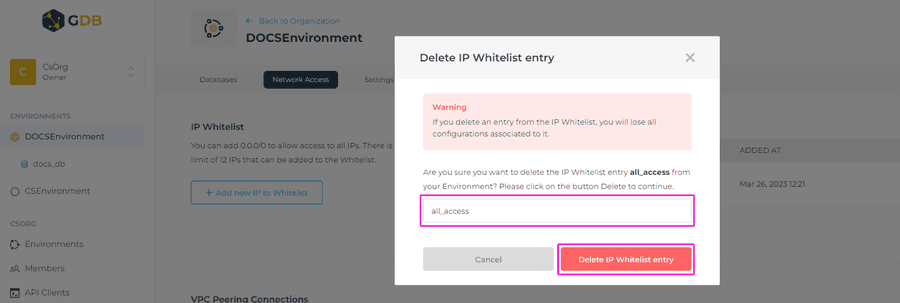
The modal window will appear, where you’ll need to enter the name of the IP whitelist entry, and then click on Delete IP Whitelist Entry button to complete this action.


